Showing posts with label Hordes. Show all posts

Sunday, 5 April 2015

Riven Bonds League Game 7: Mordikaar vs Issyria

Hello again! It is time for another report. It's been a while, but we're back with another game for the league, and another trial game with Skorne this time against Mat's forces of Retribution. I finally put together the models I needed for a solid 50 point list, in this case a Mordikaar list that I am really excited to try out. The only models from this list that I have used before are the nihilators and the beast handlers (Well and I guess the Swamp Gobbers from when I owned Circle a few years ago) so this was going to be a fun trial!

Void Seer Mordikaar (*5pts)
* Basilisk Drake (4pts)
* Basilisk Krea (4pts)
* Tiberion (11pts)
Cataphract Cetrati (Leader and 5 Grunts) (11pts)
* Tyrant Vorkesh (3pts)
Cataphract Incindiarii (Leader and 5 Grunts) (9pts)
Nihilators (Leader and 9 Grunts) (8pts)
Paingiver Beast Handlers (Leader and 3 Grunts) (2pts)
Swamp Gobber Bellows Crew (Leader and 1 Grunt) (1pts)
Agonizer (2pts)

I think the list seems very strong against a lot of drops, and I think I am going to have a lot of fun playing it. It is very heavily borrowed from Martin Hornacek, because he is a very strong player that I have a lot of respect for, and I am still very new to Skorne so borrowing lists is very helpful. With that being said, I have Incindiarii in the list which he does not, which I think makes the list a bit more diverse giving it some ranged presence, but I'm sure he has a good reason for not taking them in his main list.

This list struggles against upkeep removal, remove from play and heavy armor. The first two because it messes with Mordikaar's attrition game, and it has issues with heavy armor because nothing in the list hits extremely hard, except for the Cetrati (of which there are only 7, with a small threat range) and Tiberion. While I definitely feel like Tiberion can handle a heavy without a problem, he might have issues with say.... a character heavy and a colossal.... theoretically...

 Issyria, Sibyl of Dawn (*6pts)
* Hyperion (18pts)
* Imperatus (12pts)
Houseguard Halberdiers (Leader and 9 Grunts) (7pts)
* Houseguard Halberdiers Officer & Standard (2pts)
Mage Hunter Strikeforce (Leader and 5 Grunts) (5pts)
* Mage Hunter Commander (2pts)
Arcanist (1pts)
Arcanist (1pts)
Dawnguard Destor Thane (4pts)
Houseguard Thane (2pts)
Mage Hunter Assassin (2pts)

Oh look, a character heavy and a colossal! Who saw that coming?

I am always worried when I see Issyria on the other side of the table. I know that she generally dies off after her feat turn, but damn it's a good feat turn, and I usually end up not having an army left after it is done. This is of course speaking from Cryx and Merc experience, so I am hoping Skorne will be able to whether (weather? whatever) the feat better, but we will see how it goes.

We rolled off for scenario and ended up with two fronts. Mat won the initiative roll and chose to go first.

Retribution Deployment:
Hyperion pre-deployed slightly to the right side of the table (Mat's left side), with Imperatus and Issyria going in the middle. The halberdiers went to Imperatus' right, with the thane beside them and an arcanist beside each warjack. The destor thane when to the left of Hyperion, with the MHA deploying in front of him and the strike force deploying in front of the halbs.
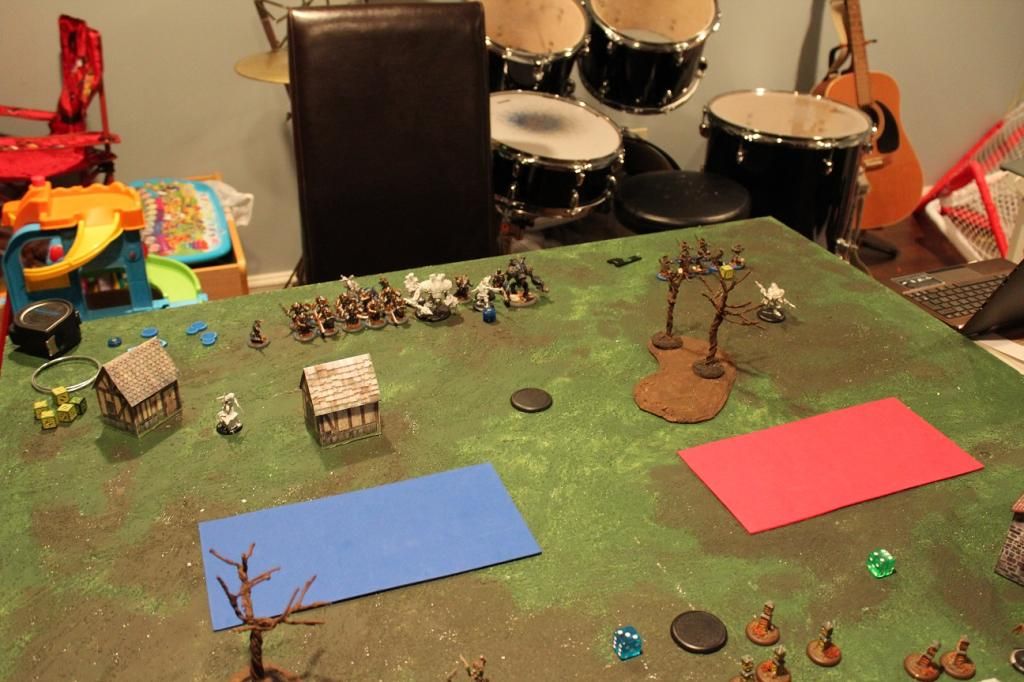
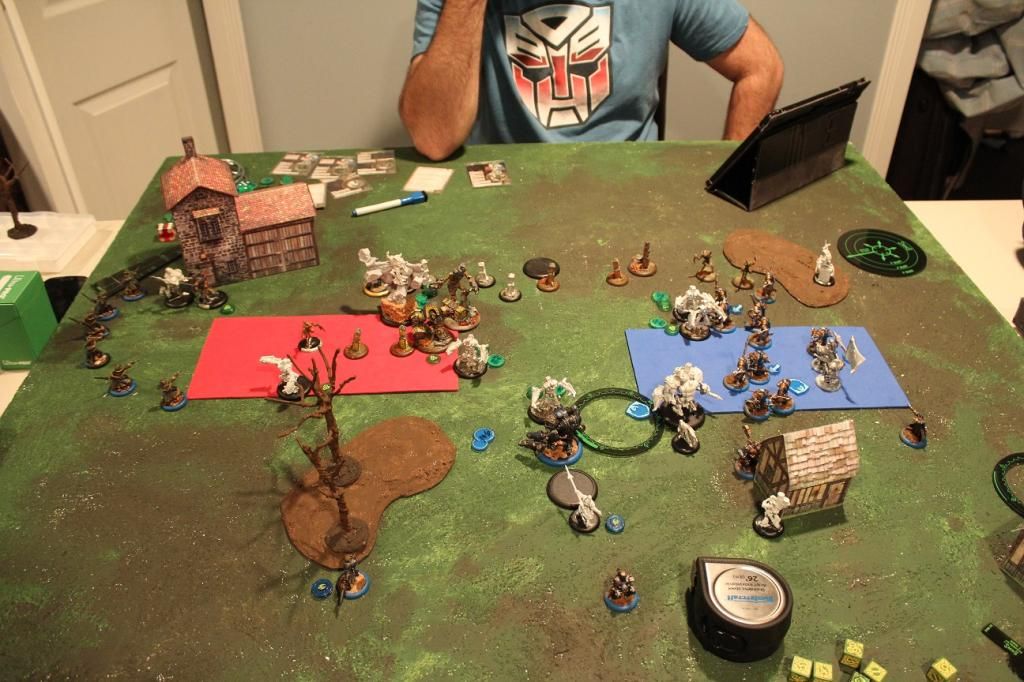
 photo 0.1 Ret Deployment 1_zpsz663fnvr.jpg

Skorne Deployment:
I deployed with my battle group right in the middle. The cetrati went on the right side to try and contest my zone, while the nihilators and incindiarii went to the left side of the table to deal with the halbs that would be coming towards me, as they wouldn't be much help on the other side against the hyperion. The beast handlers went in the back, as support units do, and the agonizer went off to the right side so it could try and deny some focus allocation to the hyperion.

 photo 0.2 Skorne Deployment_zpsu3k0c0ec.jpg

Retribution Turn 1:
As expected in warmachine turn ones, there was a lot of running. Basically everything ran forward except the thane which gave desperate pace to the halbs, the arcanists which each gave a focus to their warjack and Issyria who cast admonition on Imperatus and inviolable resolve onto the hyperion.

 photo 1.1 Ret_zpsdbfaqz54.jpg

Skorne Turn 1:
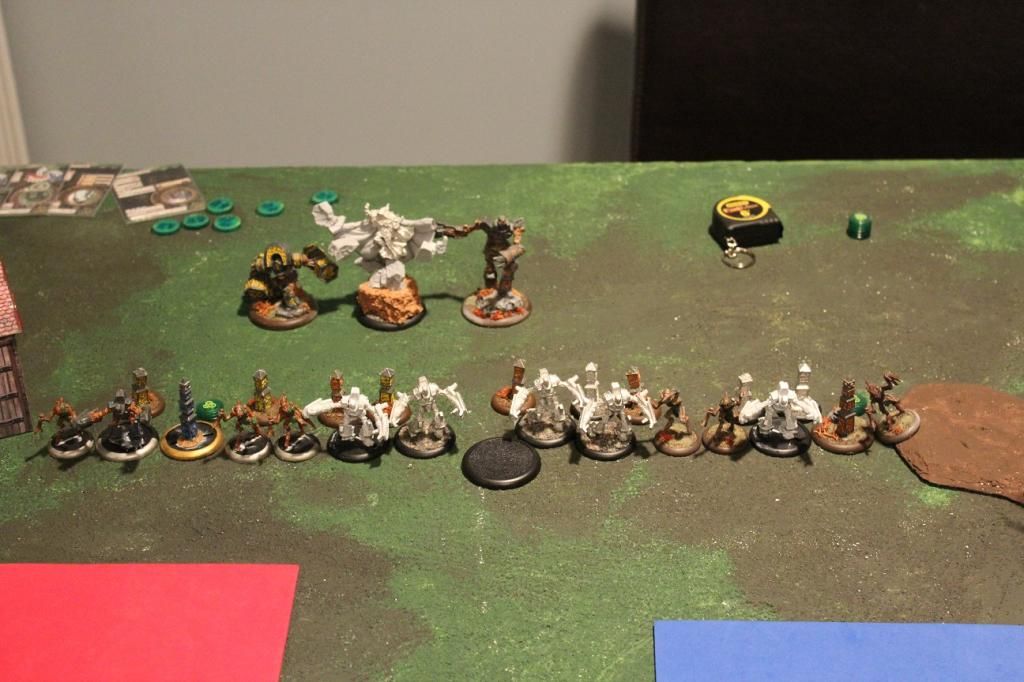
Again, nothing super exciting, a lot of things ran. I considered taking some shots with my incindiarii but decided that it would probably better if I got them into a stronger position for next turn. The krea but up its animus and charged, the nihilators and cetrati ran. At this point Mat (and some on lookers) was giving me raised eyebrows, since I just moved my whole army into his threat range, but I had a plan! (Sort of). Mordikaar activates, walks forward and casts hollow onto the nihilators and dumped the rest of his fury onto the agonizer. Then he popped his feat, giving everything in my control area (which was everything except the incindiarii on the far left) +3 defense and poltergeist. The support staff ran forward, and I was done. (For the record the two empty bases on the field are a nihilator and a cetrati that fell off of their bases as I was unpacking them).
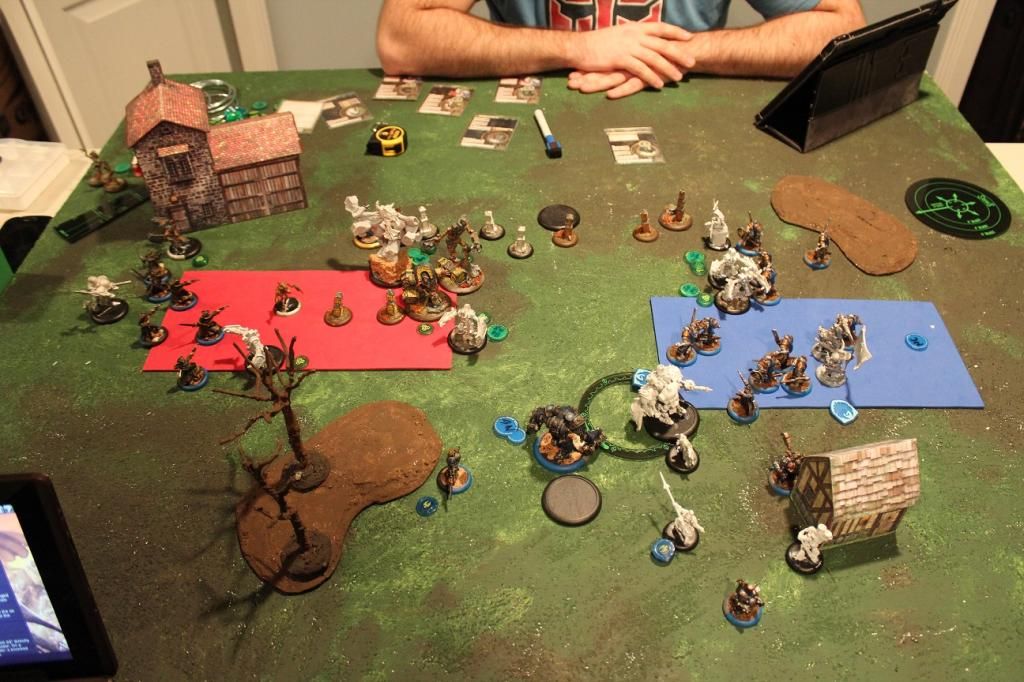
 photo 1.2 skorne_zpskhiwycsu.jpg

Retribution Turn 2:
Mat spent some time deciding if he should back up and let my feat drop, or if he should counter feat and try to get some work done. In the end he decided to counter feat, and started his turn by activating Issyria floating over to the left and popping her feat. She then cast crusader's call and gave Impy an ancillary attack, which he used to shoot a nihilator, hitting and killing it. The strike force activates, with a few of them standing still and the rest moving forward to take some shots at the nihilators. The feat helped them hit, and they ended up killing a few of the nihilators.

Next the halberdiers receive desperate pace from the thane, pop their mini feat, and charge my incindiarii. Thanks to the feat and some good rolling, they manage to kill all but one of the models in the unit, and the last one only survived because the halbs couldn't get a line to charge it. Then the halberdiers used reform to back up a bit and contest the zone, while a couple of them moved farther forward to jam my remaining models.

Imperatus and the hyperion both move forward and take some shots, but neither of them did anything game changing (I think the hyperion just put a couple of points of damage on the drake, but I don't remember exactly), although Imperatus did light Tiberion and a nihilator on fire after killing another nihilator. The mage hunter assassin charged one of my cetrati, easily killing it, and the destor thane moved forward and used its gun to kill a nihilator or two.

In total by the end of the turn I had lost 6 nihilators, giving Mordikaar 6 souls, as well as 5 incindiarii and a cetrati. I wasn't expecting to loose as many incindiarii as I did, but one lived which the most important part, and it was time for some payback.

 photo 2.1 ret 2_zpsize8u2kc.jpg

Skorne Turn 2:
Neither of the fires go out, but the nihilator makes his tough roll and Tiberion takes no damage. Mordikaar leeches in his fury, upkeeps hollow and the turn begins. Mordikaar activates first, and uses all 12 of his fury to cast revives. He brings back three of the incindiarii that died, as well as the one cetrati that was killed by the mage hunter. The incindiarii activate, and take some shots. The one in melee takes a swing at the halb in front of him, hitting and killing it, and the rest of them shoot into the blob of halbs in the middle of the table, killing a few of them and lighting a few more on fire. The nihilators activate and shuffle around to make sure they don't have any friendly models in their melee range, and then they kill the three halberdiers in front of them.

The cetrati go next, receiving a shield wall order and shuffling forward. The revived cetrati takes a big hit on the destor, bringing him down to two boxes, and then Vorkesh proceeds to miss his attack. Two of the cetrati in front of the mage hunter try a CMA on her and miss, and another one swings by itself and misses as well (the fourth one couldn't get in melee range).

The drake walks forward, staying out of melee with the destor, and sprays a line down the strike force. He catches two grunts and the UA, boosts to hit on all three, and misses all three attacks. Next the agonizer starts screaming and running around in a way that only an agonizer can, ending up in the middle of the board and hopefully in range to deny focus allocation to both Imperatus and the hyperion. Tiberion and the krea both move forward to get in a better position for next turn, and both use their animi to try and help survive through the next turn. The beast handlers move forward but don't do anything, because I'm right where I need to be for fury, and the gobbers move up and drop a cloud to try and block LoS to Mordikaar.
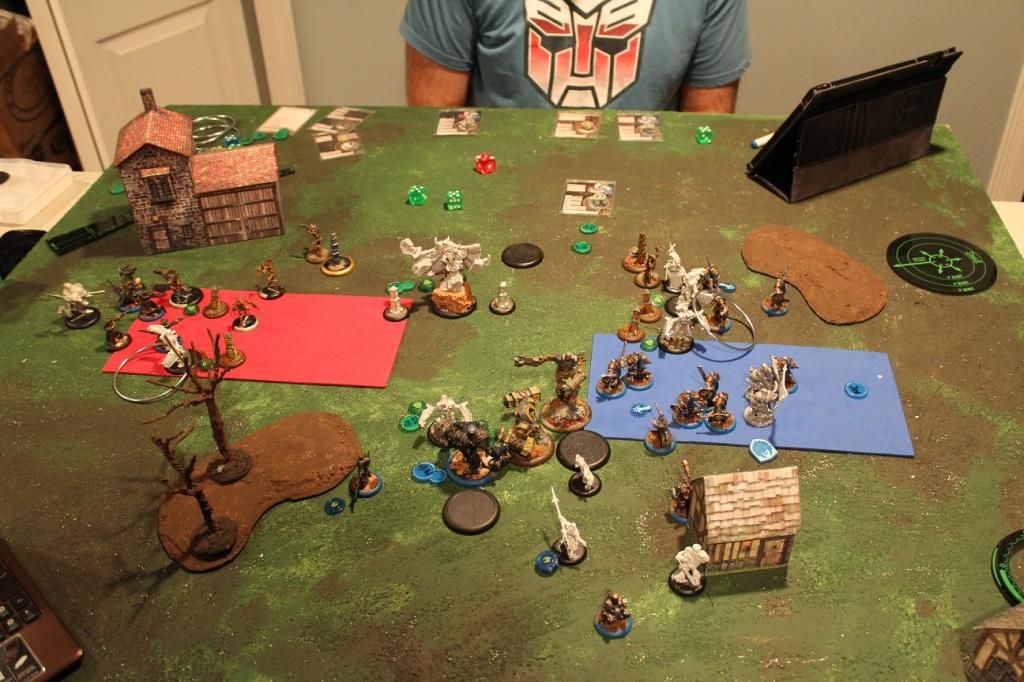
 photo 2.2 Skorne_zpsalwjpugo.jpg

Retribution Turn 3:
Issyria upkeeps both of her spells, and then we do some measuring to see if he can allocate focus or not. Both warjacks are within the agonizer's bubble, so there is no focus allocation this turn. Mat wants to get rid of the agonizer, so Imperatus activates first, and walks forward to kill the agonizer. He kills it easily, and then sidesteps backwards to get back into the zone, and to get away from Tiberion. With that out of the way an arcanist activates and gives hyperion a point of focus. 

Hyperion activates and charges forward (with a free charge from Mat's fuel cache objective), easily killing three cetrati with it's initials and a purchased attack. The mage hunter swings at a cetrati, but doesn't manage to kill it. The strike force moves forward, use some shots to clear out a few beast handlers, and take a few swings on the drakes, doing some light damage. The thane also takes a swing, hitting the krea but not crippling any systems.

The halbs move forward and kill two of the incindiarri. Finally Issyria activates, ancilliary attacks Imperatus, getting him to kill a nihilator, and then uses her spell that lets her move to fly away and hide.

 photo 3.1 Ret 2_zps8vdazqcu.jpg
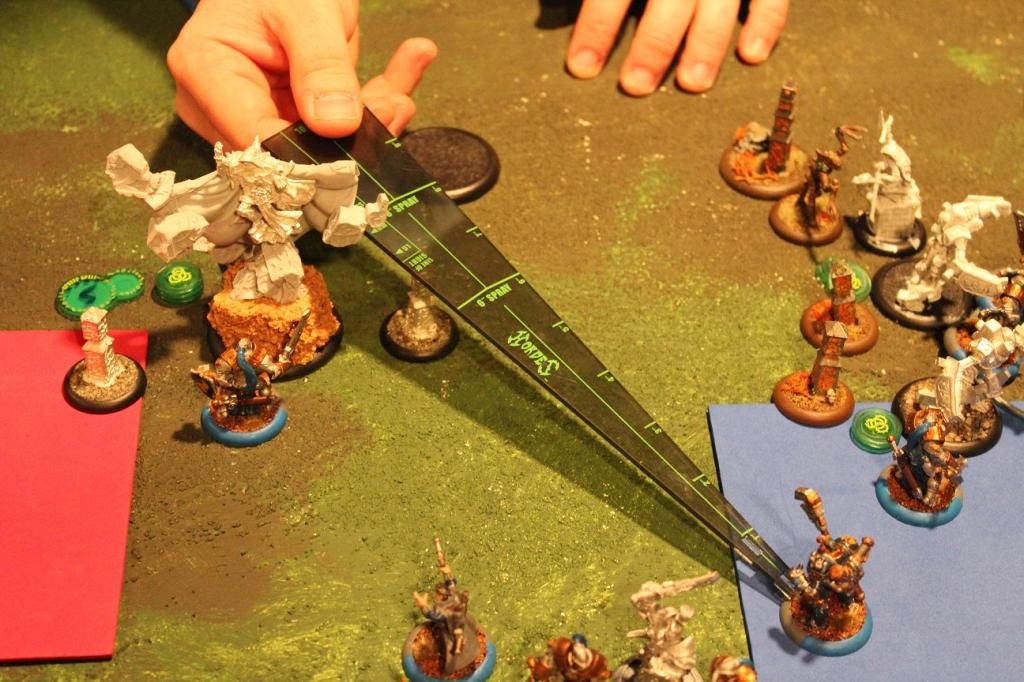
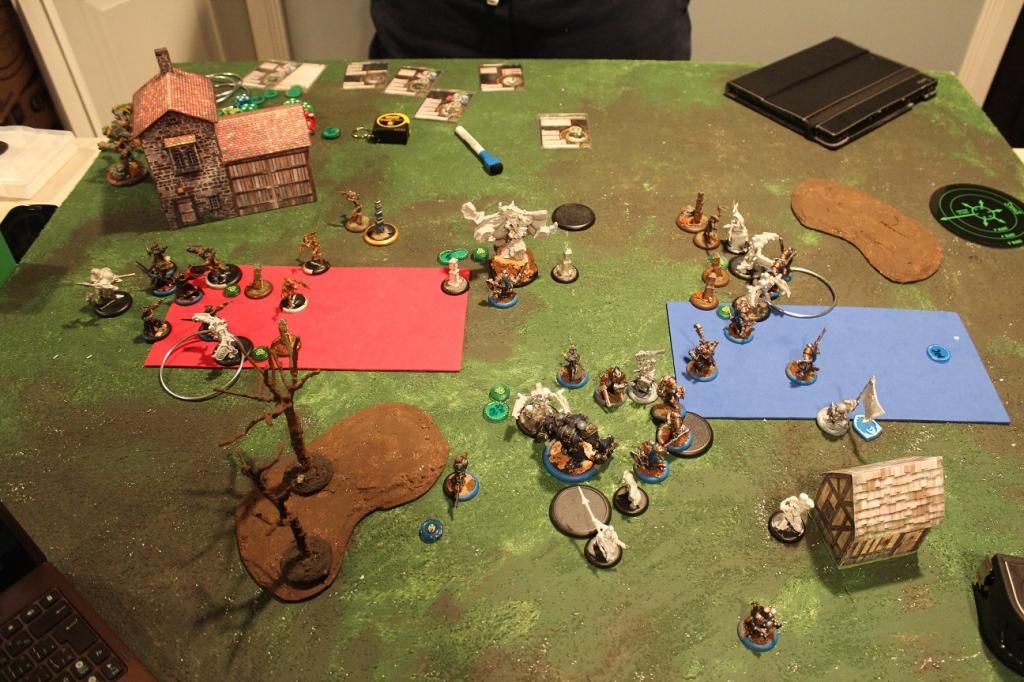
Sorry for the dark picture here.
Skorne Turn 3:
Mordikaar leeches in his fury and upkeeps hollow again. He moves forward an casts ghost walk on the drake, as well as casting a revive to bring back a cetrati.

The krea activates and shuffles around the thane, staying in it's melee range and also getting in the way of hyperion (and contesting the zone). Using the flank bonus from the drake, the krea is able to easily kill the thane, and takes a swing at hyperion as well but doesn't do any damage. Next the nihilators move up and take some swings, killing a mage hunter or two and clearing a bit of room. The drake backs up (not taking free strikes thanks to ghost walk) and lines up another spray. Boosting to hit again, this one manages to kill the UA and two strike force members. 

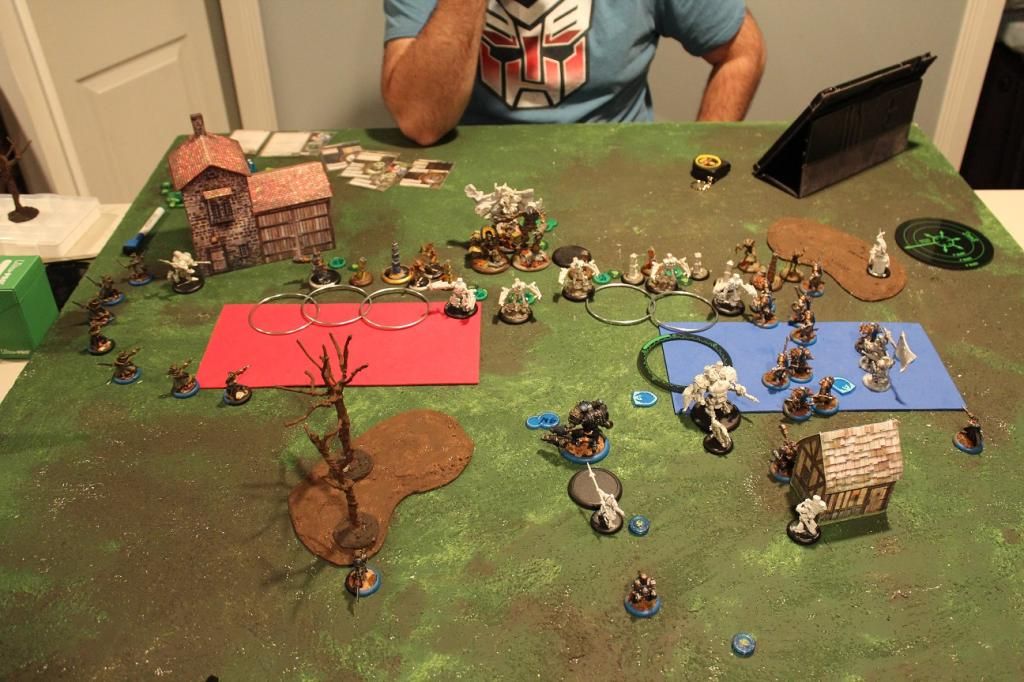
Tiberion moves forward and uses his bump animus, while the incindiarii try to kill the halbs engaging them but both wiff their melee attacks. Two of the cetrati CMA the mage hunter assassin, finally killing it, and the other two charge the hyperion, doing a bit of damage to it. Finally, the gobbers move forward an pop a cloud (which happened after the picture below) and the turn moves over to Ret.

 photo 3.2 Skorne 2_zps0yfbucrc.jpg

Retribution Turn 4:
On the retribution turn both warjacks get loaded with focus and the turn begins. The arcanists move forward and give their jacks concentrated power, and then Hyperion activates and squishes all four cetrati. He missed one attack, so he couldn't swing at the krea at all, but some strike force members charge it in the back, doing some more damage but not managing to kill it.

The other strike force take some swings in melee, and along with the halb standard bearer, try to make a bit of a wall for Imperatus. The other halb members manage to kill a nihilator and an incidiarii, and then Imperatus actiavtes. He walks forward into melee range of Tiberion, with a model behind him to prevent being bumped away, and begins swinging. 

In the end he did a ton of damage to Tiberion, and crippled two aspects, but is unable to kill him. With nothing else to attack Tibbers, Mat ends his turn and it's time for some revenge.

 photo 4.1 Ret 1_zpszgj0t8bi.jpg

Skorne Turn 4:
At this point, things are looking pretty bleak for the forces of Skorne. Looking at the board, I'm thinking that my best bet at this point is to try and clear the zone on the left and then sprint Mordikaar over there. With that in mind, Mordikaar leaches his fury, drops hollow, and begins the turn.

Since I wanted to be able to run Mordikaar to the zone, I needed to have the beast handler heal Tiberion. Unfortunately this meant no enrage, but I would have to hope for the best. The handler moves up and brings Tiberion back to full functionality, and then Tibbers activates and goes to town on Imperatus. After taking all my attacks and filling up on fury, Imperatus was still alive, but my final hit was a crit. Using this I slammed Imperatus backwards, killing the standard bearer, and knocking down Imperatus. My nihilator moves forward and kills the strike force member in front of my drake, freeing him up. The drake then moves forward and sprays Imperatus, catching him and the thane in the spray. With some boosts I manage to kill both the thane and Impy, but then Imperatus uses his once per game ability to regenerate. Man I hate that ability.

Since I won't be able to clear the zone this turn, I go back into spell casting mode with Mordikaar, casting two revives to bring back some incidiarii. They kill one of the halbs and get ready to take some shots next turn. The krea kills a strike force member, leaving a fury spot open for transfers, and the gobbers back up and pop a cloud. 

 photo 4.2 Skorne_zpshise05jg.jpg

Retribution Turn 5:
Nothing Super surprising happens this turn. Hyperion and Imperatus both recieve focus, and begin clean up duty.

Imperatus moves forward and kills Tiberion, while the hyperion moves forward and kills both basilisks. The remaining strike force members move forward and kill the gobbers, and a halberdier kills the last beast handler.

 photo 5.1 Ret_zpsenpksgau.jpg

Skorne Turn 5:
On my turn, I'm down to a last ditch play to try and pull out a win. Mordikaar buys two revives, bringing back two more incindiarii, and they move forward as far as they can. One of them kills an arcanist that was in the way of drawing a line to Issyria, and then I begin lobbing AoEs at Issyria. None of them are able to drift the right way, so my turn ends and Imperatus walks up to Mordikaar, easily putting him into the ground.

 photo 5.2 Skorne End_zps6aghuraq.jpg

Victory to Retribution!

Thoughts on the game:
Well, I am happy with the way the list performed. It definitely doesn't have the hitting power to deal with Imperatus and a Hyperion, but it was able to grind it out anyways. Revive is an amazing spell, especially with hollow, and I really enjoy being able to bring models back to whichever side of the battle field needs the support.

I'm looking forward to playing some more games with Mordikaar, and hopefully next time I can pull out the win!

As a side note, this game ended up taking over four hours, due to some distracting conversations going on throughout the game. After this I think we are going to start playing our games on the clock. Not only will in reduce game time, allowing us to get in extra matches, but it will also start preparing us for the death clock we will be seeing at the Southern Ontario Open.

Monday, 16 March 2015

Riven Bonds League Game 6: eMakeda vs pStryker

Hello again!

Got in another league game the other night, this one a 25 point match vs. Dave's cygnar. My all-in-one box finally came in, and I was excited to finally get to play a game with beast handlers! (How I have gone without them this long I have no idea). For two points (or three in this case, because I don't have a one point filler) they bring so much utility, I can't see any reason to not bring them in a list. With the all-in-one box also came eMakeda and Molik Karn, so I decided to bring them out as well. With those three things, a gladiator and a unit of nihilators, I ended up with this list:

Supreme Archdomina Makeda (*5pts)
* Molik Karn (11pts)
* Titan Gladiator (8pts)
Nihilators (Leader and 9 Grunts) (8pts)
Paingiver Beast Handlers (Leader and 5 Grunts) (3pts)

Dave, trying to keep up his streak of a new caster every game, decided to bring out pStryker. Stryker is looking a little small and girly this game, because secretly Stryker is pKaya (that's what happens when you leave models at home!). Trying to rebuild his list by memory (and pictures!) I'm coming up with the following list:

Commander Coleman Stryker (*6pts)
* Lancer (6pts)
* Stormclad (10pts)
Silver Line Stormguard (Leader and 9 Grunts) (9pts)
Stormblade Infantry (Leader and 5 Grunts) (5pts)
* Stormblade Infantry Officer & Standard (3pts)
* 1 Stormblade Infantry Storm Gunner (1pts)

Which is actually 28 points of Cygnar. I am assuming that the Silver Line unit was actually supposed to be a minimum unit, which would bring the list down to 25 points, but he definitely had 10 of them on the table. Whoops.

Anyways, the scenario that we played was destruction, and Dave won the roll and chose to go first. I picked the side of the table with a wall on it, and it was time for Cygnar deployment.

Cygnar Deployment:
Dave deployed with the silver line stormguard in the front, and the storm blade infantry behind them. The jacks went to their right and pKaya... I mean Stryker... went and hid behind them like the girl he/she is.


Skorne Deployment:
Fairly simple deployment on my side. Makeda went in the middle so that she could cover the army with road to war. The nihilators deployed to her left with her warbeast to her right, and the beast handlers went in the back.


Cygnar Turn 1:
Stryker gave a focus to the lancer, and then everything ran forward. The stormclad used its free focus from the stormguard to run forward and then Stryker walked up. He cast arcane shield on the stormclad and snipe onto the stormblade infantry.


Skorne Turn 1:
Similar to Dave's first turn (and most warmachine turn 1's) everything ran forward. Makeda cast road to war and put leash onto Molik, and moved foward. The nihilators ran up to the zone, with two of them getting into the zone thanks to road to war. The warbeasts both riled and ran, and the beast handlers just ran forward to keep up with the beasts.


Cygnar Turn 2:
Stryker upkept both spells and kept the rest of his focus. The stormguard went first and issued a charge run order. A few of them charged the front three nihilators, killing all three, and the rest just ran to get in a better position, and going base to base for their no-charging ability.

The lancer walked forward and then Stryker activated and moved forward just enough to be within the kill box. He arced an earthquake through the lancer, knocking down three of my nihilators, and then popped his feat giving his army plus 5 armor. The stormclad just moved forward, and then the stormblade infantry walked forward and took some shots, and managed to kill one more nihilator.


Skorne Turn 2:
Makeda pulled in her fury, upkept leash, and then I activated the gladiator. He walked forward a bit and cast rush on Molik (Wasn't just if he needed it, but why not), and then the beast handlers moved forward and pulled the fury off of the gladiator. One of the handlers enraged Molik for the free charge, and then he charged one of the silver line that was not base to base. With side step and two purchased attacks, Molik killed 4 of the silver line. He ended up without any more models within his reach, so he used his animus, fatewalker, and ended his activation.

Makeda shuffled forward a little bit to get out of the kill box, and allowed Molik to use his leash movement to move 3" back towards my line. She then cast road to war for the extra movement on the nihilators and she was done. The nihilators moved forward and thanks to Stryker's feat (and the fact that three of them were knocked down) managed to kill a grand total of one stormguard. With that I ended my turn and Molik used his fatewalker move to walk back behind my line of nihilators.


Cygnar Turn 3:
Stryker again upkept both spells, and kept the rest of his focus. The lancer moved forward and killed a nihilator, and then everything charged forward. The silver line charged in, followed by the stormblades, and with some great tough rolls on my part the two units killed a total of 2 nihilators, although some of their shots also put a bit of damage onto Molik. The storm clad walked forward and shot one of the nihilators that was still alive, killing it and bringing me down to 2 still alive.

Stryker activated and walked to the right, then arced another earthquake through the lancer, this time aiming at Molik Karn, boosting to hit. He missed the shot, but the spell deviated and caught Molik anyways, knocking him down.

What a nice group of berserk-able models!
Skorne Turn 3:
Well, I was almost out of nihilators, but Stryker's feat was gone and it was time for some fun. Makeda let leash drop and Molik forced for one to stand up.

Makeda activated first, and moved forward to make sure she could cover the front of the Cygnar lines with her control area. The then used her feat, cast road to war and cast fate walker on herself.

The nihilators activated next and got ready to bring the pain. With Makeda's feat up they were immune to free strikes, which meant I could put both of them in the perfect position for berserking. They were hitting on 5's (boosted to hit from the feat) and killing on 4's, which means that with a string of average rolls I could eliminate everything that could get within reach of my nihilators. The nihilator on the right went first and started swinging, taking out four models before running out of targets. Then the second nihilator started attacking (with 6 guys within reach of his blade), hit the first model and then rolled a 3 for damage.... *sigh*... Well, that's dice for you.

With that done, the gladiator cast rush on Molik, the beast handlers pulled fury off the gladiator and enraged Molik. One of the beast handlers walked up to the stormguard sitting beside the objective, and with boosted rolls from the feat, easily hit and kill the model (thanks to anatomical precision). Finally Mr. Karn activated, and charged the Lancer. He hit thanks to the feat, and rolled a damage roll of: 6, 6, 5, 5. Doing a whopping 19 points of damage, and making up for my terrible roll earlier. Using side step, Molik shuffled over to the left in order to get closer to the infantry in the back. He took his second attack on the warjack, side stepping again and leaving it on only a few boxes. A finally bought attack put the jack into the ground, and left Molik with 3 fury left to spend. He used fate walker on himself and purchased an attack on the stormguard in the back, easily hitting and killing it.

With that done, Molik and Makeda both used fate walker to retreat back behind my lines and (hopefully) out of danger.


Cygnar Turn 4:
In hindsight, I should have moved Molik to the left side of my table (near the gladiator), because where I left him was right within assault range of the storm blades. Stryker kept his focus, and activated first. He moved over to the right side of the table and cast an arcane bolt at my un-engaged nihilator, hitting and killing it. The remaining stormguard activated next and took a swing at the nihilator in front of him, also hitting and killing, and freeing up the stormblades.

The stormblades activated next, recieving an assault order, and charged forward. Two of them assaulted the beast handlers near my objective, and the rest assaulted Molik Karn. Both of my beast handlers died, and my objective received a couple points of damage. The models charging Molik got some pretty good rolls, and managed to kill him with a couple of attacks to spare, 

After writing this I am realizing that I don't remember what the stormclad did this turn, but I think that one of my nihilators made its tough roll and the stormclad had to finish the job. Either way the result is the same, but I should probably start taking notes during games to help remember everything!


Skorne Turn 4:
With all of my nihlators and Molik gone, things are starting to look pretty bleak. If I still had Molik around for fate walker I would probably get Makeda into the action at this point, but I didn't want to leave her in the charge range of Stryker or the stormclad, so I activated her fist and moved her back behind the wall on my left.

Next I had an idea, that worked a lot better in my head than it did on the table. For some reason I thought that slamming one of the storm blades would cause him to damage all of the other storm blades in his path. I forgot that he would stop moving as soon as he contacted another base of his size, so I activated the gladiator, he cast rush on himself and he used a slam on the left storm blade. It died instantly, but it only hit the model right next to him, doing light collateral damage (as it was the officer that was hit) but not killing him. So my gladiator ended up killing a grand total of one model. Not exactly what I had planned.

Next the beast handlers moved forward and cleared out the storm blades by the objective, while one went over near the gladiator and hit the officer but only did one point of damage, leaving him with a single box left.


Cygnar Turn 5:
Stryker gave 3 focus to the storm clad, and it activated first. It charged the objective, killing it, and clearing out my beast handlers with lightening leaps. The stormblades moved in to attack the gladiator, doing a fair amount of damage to the beast and killing the beast handler. Stryker ran over to the other side of the zone in order to dominate it and ended the turn.


Skorne Turn 5:
At this point I either need to kill Stryker or lose, because the storm clad will kill my gladiator and Stryker can just dominate for the win. Makeda leaches the fury off of the gladiator and activates first, moving forward and spending all of her fury to cast rush and heal the gladiator. The gladiator activates and tramples towards Stryker, hoping that after free strikes it still has its systems up to try and kill Stryker (although even with all of its systems up, I don't know that he could do it). Unfortunately the dice gods were not in my favor, and the free strikes taken by the gladiator are enough to kill it, ending the game with Stryker dominating for a Cygnar victory!


Thoughts on the game:
While I ended up losing the game, it was pretty close until I lost Molik, which was a pretty big hit to the army. If I had moved him to the left and out of the charge range of the stormblades I would have still had a pretty good shot, but it's hard to say what would have happened. I really enjoyed eMakeda, and she seems like a very strong caster for getting the alpha strike, with some insane assassination potential. Dave kept Stryker back all game, knowing the threat that Molik brings to a caster, as he has a 22" threat range under Makeda (18" without using side step). It is a crazy threat range, especially with no free strikes and boosted attack rolls from the feat, and it can very quickly end a game if your opponent makes a single positioning error.

I am looking forward to trying out Makeda again, as well as Mordikaar who I have just finished assembling. Really enjoying Skorne, and I hope you guys are enjoying the reports! 

Monday, 9 March 2015

Riven Bonds League Game 4: Zaal vs Axis

Game night at our LGS was a couple days ago, and I only managed to get in one league game, but I also got in a game of high command for some more sweet, sweet experience points.

The game that I played was 25 points and it was against Brian who was playing Convergence. Convergence is probably the faction that I know the least about, so I will try to cobble together the list he was playing, but there might be some errors. I brought my Zaal list again (as I only own two casters at the moment) and pulled out the Nihilators and Saxon Orrick in order to bring the list down to 25 points:

Supreme Aptimus Zaal & Kovaas (*5pts)
* Cyclops Savage (5pts)
* Reptile Hound (2pts)
* Titan Gladiator (8pts)
Immortals (Leader and 9 Grunts) (8pts)
Ancestral Guardian (3pts)
Orin Midwinter, Rogue Inquisitor (2pts)

And my attempt at Brian's 25 points of Convergence pulls together a list that looks something like this:

Axis, the Harmonic Enforcer (*6pts)
* Cipher (9pts)
* Inverter (8pts)
Clockwork Angels (Leader and 2 Grunts) (3pts)
Obstructors (Leader and 9 Grunts) (6pts)
Algorithmic Dispersion Optifex (1pts)
Steelsoul Protector (2pts)

Along with some form of floating balls, that kept putting flare on my stuff making it easier to hit them. (Also Algorithmic Dispersion Optifex? Who named this crap? I'll just call that ADO for the sake of my sanity). We played the same scenario that I played in my first game with Dave, that has a central fort shooting AoE's (mostly because it is an extremely easy scenario to set up). For those who didn't read that report, the fort is arm 24 with 80 boxes, but to be honest I don't think anyone made a single attack on the fort this game (unlike the game with Dave, where everything on the table attacked the fort).

For this table, which I have used in these reports before, we ignore most of the hilly areas on the table There is just way too much of it to be hills or rough terrain, so we just let it be pretty scenery. All of the items not attached to the table are actual terrain, with a hill in front of my deployment and the piles of rubble acting as rough terrain. I won the roll and chose to go first, and we were off.

Skorne Deployment:
I deployed everything fairly centrally on the table. Zaal and Orin got ready to run up the middle and hide behind the fort all game, while the Gladiator and Savage went to flank around the left of the building, and everything else deployed to move up the right side of the building.


Convergence Deployment:
While I was expecting to see some big smashy robots across from my gladiator, Brian deployed everything on the right side of the table (his left) across from my immortals. The angels went to the far side of the board edge to flank my army, and everything else deployed in a line with the warjacks and axis on the left, the unit on the right and solos spread out between them.


Skorne Turn 1:
Fairly normal warmachine turn, everything ran forward. Zaal cast awakened spirit on the gladiator and inviolable resolve on the immortals. At the end of my turn I was able to shoot out two AoEs from the fort, and with some good deviations and damage rolls I was able to kill two of the angels, causing the last one to fail its command check and flee.


Convergence Turn 1:
Convergence turn 1 was fairly similar to my first turn, with most things running forward. The obstructors moved forward in shield wall and axis cast iron aggression on the inverter. The cipher moved up and took some shots, and he also took his two shots from the fort at the end of the turn. I don't remember which AoEs did how much damage, but by the end of the four shots each of my reptile hounds were sitting around two or three health.


Skorne Turn 2:
Since both of my reptile hounds were about to die anyways, I figured I would finally get some use out of last stand. Zaal leeched his fury, upkept both spells and activated first. He shuffled forward a bit, used two fury to heal the spirit on the back hound and the mind on the front hound, and then cast last stand onto the front hound.

The immortals were in my way so I activated them first. One of them charged the floating ball in the front, killing it easily, and the rest just ran foward. At this point I learned that all of Axis' warjacks have counter charge, and the inverter charged forward and killed one of my immortals. With that done the reptile hound in the back ran foward to get into melee with the warjack, in order to give the flank bonus, and my second reptile hound charged. Some terrible dice rolling (one roll contained 3 ones) meant that I only ended up putting some light damage on the warjack, but I can't really expect much more from an almost dead 2 point lesser warbeast.

The gladiator and savage just ran forward, and Orin moved forward to pop null magic from behind the fort. For the record, the fort is actually a solid object and you can't draw LoS through the gaps in the walls there, we just didn't have longer walls to make a solid fort.

I took my two shots from the fort at the obstructors and managed to kill one or two of them.

That reptile hound actually died from last stand, I didn't remember until after taking the picture.

Convergence Turn 2:
Looks like I missed a picture here, but nothing super crazy happened so it should be fine. Axis dropped IA, as the warjack doesn't really need it to hit my immortals, and gives both warjacks a couple points of focus. 

One of the little floating balls moves up and puts flare onto my immortals and the reptile hound, and then the inverter starts swinging at them. It puts the reptile hound into the ground, as well as an immortal or two that it could reach. The cipher moves up a bit and takes some shots into the immortals in the back, killing one and leaving rough terrain in the middle of them. The angel moves up and tries to shoot but doesn't kill anything, and the obstructors move forward in shield wall. At the end of his turn the fort fires again, puts a point or two of damage on Orin but doesn't damage anything else.

Skorne Turn 3:
First the immortals make their vengeance moves, mostly moving forward to engage the inverter. The ones that are able to get in range get some very solid damage rolls and end up doing quite a bit of damage to the warjack. Zaal leeches his fury, upkeeps both spells and activates first. He moves up right behind the fort, and uses his soul converter ability to give the AG a soul (an ability that I have been forgetting to use every turn).

The gladiator shuffles forward to get a in a good position for a charge next turn, and puts rush on the savage. The savage walks forward and swings at the floating ball, missing every attack it makes, even with boosting (*sigh*) but that is okay because my plan is to just use him as bait to bring in something big for the gladiator. The immortals activate and start swinging at the inverter again, bringing it down to only 5 or 6 boxes, and somehow managing to not knock out a single system. Two of the immortals charge into the obstructors and each kill one, and then I activate the ancestral guardian. It uses its soul for 2" of movement and charges the warjack, but is unable to get into melee as the immortals were in the way. Orin uses counter magic, the fort fires two more shots that do no damage, and my turn is done.


Convergence Turn 3:
On the convergence turn, I'm happy because it looks like my bait worked. Axis hands out a couple points of focus and then activates first, popping his feat (which the gladiator was out of ). Then he does something I wasn't expecting, and charges the savage himself. He makes a few attacks but is unable to kill it, so the cipher walks over and finishes the job. The inverter and the obstructors make a few attacks, killing some immortals (and my hero, meaning another roll on the injury chart) but at this point I wasn't very concerned about my immortals any more. The fort fires off two more shots towards Zaal and Orin, but with some poor deviations they do no damage.

The inverter was having issues standing on the hill.
Skorne Turn 4:
At this point I am pretty confident that the gladiator can end the game, but I wanted to make sure it would happen. 

Zaal activates first, and walks as far as he can towards the gladiator. He casts last stand on the warbeats (being just within range) and pops his feat, because why not (and I have had terrible luck with dice before, so overkill is always better). The gladiator activates, casts rush on itself and charges Axis. Two swings put Axis into the ground, winning the game for Skorne with an assassination!


Thoughts on the game:
Over all I think this game went pretty well. I need to start reading my enemy caster's card at the start of every game, because the counter charge really caught me off guard and it could have been worse if it happened at a more critical time. 

I have an order in for a few new models, including the All-in-one box that should hopefully be in soon, so my next league game should see a new caster and finally a unit of beast handlers!

Friday, 6 March 2015

Riven Bonds League Game 3: pMorghul vs eLylyth

Managed to get in another game last night for the Riven Bonds league, this time a quick 15 point game. I am going to apologize in advance for the pictures, as the lighting wasn't very good where we were playing, but I figure that crappy pictures are still better than no pictures at all.

This game was against Chantal, my girlfriend, and one of our two local Legion players. Since I still don't have a huge Skorne collection, there wasn't a ton of decisions to make in building a 15 point list, and I ended up just bring the battle box plus two reptile hounds to round out to 15.

Master Tormentor Morghoul (*7pts)
* Cyclops Savage (5pts)
* Reptile Hound (2pts)
* Titan Gladiator (8pts)

Chantal on the other hand, has a fairly large Legion collection, and brought out a list that I wasn't really expecting:

Lylyth, Shadow of Everblight (*5pts)
* Raek (4pts)
* Ravagore (10pts)
Blighted Nyss Raptors (Leader and 2 Grunts) (6pts)

That is a lot of guns. And considering my list has absolutely no range, this game is going to come down to whether or not I can get my models in melee before they are all shot to death. I am confident that the Gladiator will be able to make it there, but the rest of the list can definitely die to shooting. Chantal won the roll and decided to go first, and I chose the side with a wall farther up the table so that I could park Morghul behind it.

Legion Deployment:
Lylyth was deployed on the far right with both of her beasts, and the raptors went on the other side of the table getting ready to flank my army using their insane speed.


Skorne Deployment:
I deployed everything fairly centrally. Morghul got in a position to go behind the wall, I placed the gladiator and a savage on the left side to go and deal with the Legion beasts, my second savage on the right side to go after the raptors, and the hounds in the middle so they could go to whichever side needed them.


Legion Turn 1:
Everything ran forward to get in a good shooting position for next turn. Lylyth did not cast shadow pack as it was not needed, so she just dropped 2 fury and walked forward to keep up with her beasts. The raptors began flanking by running up the field and hiding behind the obstruction.


Skorne Turn 1:
I knew next turn was going to hurt, so I just wanted to get up the board as fast as possible. Morghul cast rush on the left savage, put admonition onto the gladiator and walked up behind the wall. The gladiator cast rush on itself and slammed towards the ravagore (as it can slam for free). Everything else ran forward, except for one of the reptile hounds which just walked so that I would not go over on fury.


Legion Turn 2:
I was expecting the raptors to come around the obstruction this turn and take some shots at the savage, but instead they continued to run up the board, flanking right behind my army. I was going to have to deal with that next turn, or Morghul would be getting shot in the back, but for the moment that was the least of my worries.

Lylyth activated first, popped her feat and took three shots at the savage. Boosting damage on the shots she was able to bring the beast down to only 4 remaining health. The ravagore went next, also standing still and using its animus to light things on fire. It took a boosted shot at Morghul and missed, but only deviated 1 inch so the blast still caught him. Morghul was lit on fire and took around 8 points of damage from the blast which he transferred to the undamaged savage. The ravagore took its second shot on the front reptile hound, hitting and leaving it lit on fire with 6 health left.

Finally the ravagore charged the savage, boosting to hit and killing it on the charge attack, but also allowing my gladiator to use admonition and get in a better position for next turn.


Skorne Turn 2:
At the start of my turn, I rolled for the fire and neither of the effects went out. The fire on the reptile hound easily killed it, and on the damage roll for Morghul Chantal rolled an 11, doing 10 points of damage to the warlock. Morghul used his point of fury to transfer the damage to the other reptile hound, leaving it on three boxes.

Morghul cuts for two fury and activates first. He casts abuse on the gladiator and on the remaining savage, doing a single point of damage to each of them. He then moves forward as far as he can and uses his feat, catching the raek but unfortunately not getting in range of the ravagore. The savage runs and goes to the back of the table, engaging the three raptors so that they cannot shoot me in the back next turn. The reptile hound charges the raek just to be in the way and misses its attack.

Finally the gladiator activates. I was hoping that he was in range to charge without casting rush but after measuring my control area it looks like he will be just out. So the gladiator activates, casts rush on itself and charges the ravagore. It makes its three initial attacks and uses its final fury to buy one more attack, and in the end leaves the ravagore on a single point of health.


Legion Turn 3:
Lylyth draws in her fury, and the raek ends up having a fury left on it. It fails its frenzy check and kills the reptile hound. Next the raptors activate and using their melee attacks are able to kill the savage, freeing them up to make their light cavalry move towards Morghul.

Lylyth activates and spends to fury to heal up the ravagore. She then walks forward into the forest to be in range of Morghul and takes a shot at him, boosting to hit. She needs a 9 to hit and gets exactly a 9 on the first shot. She decides not to boost the damage, and rolls very high for damage, leaving Morghul on 3 boxes as the gladiator is full on fury meaning he cannot transfer the damage. She buys a second attack and boosts to hit again, rolling an 8, just missing and leaving Morghul alive.

The ravagore activates and attacks the gladiator with everything it has, but doesn't end up crippling any systems. And with that the Legion turn ends, and leads to a very important fire roll.

Again, sorry for the poor picture quality.
Skorne Turn 3:
First things first, I roll for the fire on Morghul and roll a 1, putting the fire out. I know that I have to kill Lylyth this turn so I activate the gladiator first, and walk him over to Lylyth.

The ravagore swings at the gladiator and misses, meaning that the gladiator is fully operation when it gets in melee of the Legion warlock. He forces for a headbutt power attack and boosts to hit, hitting Lylyth and knocking her down. Two purchased attacks later kill Lylyth, winning the game for Skorne!


Thoughts on the game:
Well, that was close. Any roll that had gone another way could have easily seen a Legion victory (Lylyth's second shot, the fire roll, the ravagore's free strike), but it is a win and I will take it! I really need to get my beast handlers, as the gladiator would have easily killed the ravagore with them around, and a krea would also be awesome to help against heavy shooting armies like eLylyth. 

As for the league, a 15 point win gets me 6xp, putting me at 14xp so far (as I also played a game of high command). 1 more point of experience will give me enough for another upgrade on my ancestral guardian, which will be awesome for increasing his power on the field. Chantal earns 5xp from the game, getting enough for her first upgrade on her forsaken.

Thanks for reading!

Thursday, 5 March 2015

Riven Bonds League Game 2: Sturgis vs Bradigus

Hello everybody!  My name is David Dussiaume and I'm excited to have been invited to contribute to the Beat Back Bat Reps site.  For the record I'm a Cygnar, Circle and Trollbloods player and I post on the main forums as Street Pizza.

Yesterday saw us kick off the latest league from Privateer Press and I was able to get in two games.  The first was against Josh, he'll be covering that one, and the second was against our local Circle player Al as discussed below.  Now before we begin I will mention that this was Al's first game ever using Bradigus.  So its not a typical example of how Brad is usually played and I mention it up front just to pre-empt any comments pointing this out.

The lists for this game were as follows:

Scenario: SR2015 Incoming

David - Cygnar
Points: 50/50
Commander Sturgis (*6pts)
* Cyclone (9pts)
* Squire (2pts)
Arcane Tempest Gun Mages (Leader and 5 Grunts) (6pts)
* Arcane Tempest Gun Mage Officer (2pts)
* * Hunter (6pts)
Sword Knights (Leader and 9 Grunts) (6pts)
* Centurion (9pts)
* Sword Knight Officer & Standard (2pts)
Captain Arlan Strangewayes (2pts)
Eiryss, Angel of Retribution (3pts)
Gun Mage Captain Adept (2pts)  (League Hero!!  Gustav Montcalm)
Journeyman Warcaster (3pts)
Ragman (2pts)
Rhupert Carvolo, Piper of Ord (2pts)
Arcane Wonder


Al - Circle
Points: 49/50
Bradigus (Tier 4)
* Wold Guardian (9pts)
* Wold Warden (9pts)
* Wold Watcher x 6 (25pts)
Sentry Stone x2 (6pts)
Shifting Stones x3 (6pts)
Fuel Cache

Deployment
I won the roll off and elected to take first turn.  Terrain had a forest on my left and a small cluster of building on my right creating a fairly narrow corridor to move up the center.  I deployed Cyclone, Sturgis and the centurion centrally to move up between the zones.  To their right I had the sword knights and far to the left the gun mages and hunter.  The solos were mostly deployed behind Sturgis except for Eiryss and my hero gun mage captain adept who were placed in among the buildings.

Cygnar Deployment

Al deployed with his warlock and two heavies in a central position behind his mixed line up of watchers, sentries and shifting stones.

Circle Deployment

Turn 1

For turn 1 my main goal was to aquire as much board position as possible without giving up easy forests to the watchers.  Arlan power boosted the cyclone and it ran up to just past the objective.  Sturgis handed out arcane shield to the centurion and snipe to the cyclone and moved up behind the objective.  Rhuper toughed the sword knights and Jr gave them arcane shield as well.  Everything else ran.

Cygnar Turn 1

Circle turn one is where Al started to surprise me.  Instead of moving up in a tight brick as would be expected from Brad he started to pull his forces apart to try and address threats moving down each flank and the center.  One wold watcher moved towards the left flank, three towards the sword knights on my right and another two down the center.  He laid down some forests, mostly for difficult terrain as his line was too long to effectively block LOS.  The warden trampled up and loosed a rift to further complicate movement on my turn.  The guardian ran and Bradigus moved up cast Synergy.

Circle Turn 1

Turn 2:

From the photo you can see the critical error where Al left me line of sight to the two central shifting stones in front of his objective each from a different set.  There was no way I was going to let an opportunity like that pass me by.  Two arcane shields were up kept as well as snipe.  I allocated three to the cyclone and started the turn.

The cylone moved up to in front of the objective and started firing for the stones.  I got lucky and rolled 3 shots on each arm.  This easily overwhelmed the shield guards and with boosted damage rolls I was able to clear both stones ... HUGE!

On the left flank the gun mages ran for position and the hunter tried a pot shot on Bradigus missing horribly.  On the right the sword knights charged/ran for position to try and tie up the watchers and mannikins on that side.  Eiryss hard flanked.  My "hero" decided to try for his aiming bonus and a brutal shot to kill the sentry stone on that side but came up 1.5" short ... way to go Gustav.  Ruhpert toughs the knights and everything else shuffles for position

Cygnar Turn 2

Al starts to take the bait hard on turn 2.  His ingrained circle mindset of Alpha strike at all costs starts to show and instead of playing the patient brick he strikes.  On the right he uses his two wold watchers to try and build synergy.  Needing 8's to hit the first one wiffs on a boosted attack and misses its second attack.  The second watcher hits but the sword knight toughs it out.

Bradigus and his battle group move up and into the left zone which critically ends up leaving the right hand watchers out of control for the next turn.  He made this move so that the left watchers could attack the gun mages and hunter as he got freaked out by the armor piercing shot wizzing by Brad last turn.  He manages to kill one gun mage with a boosted attack (forgot to place the forest) and does minor damage to the hunter.  Sitting on synergy +3 he sends the last watcher charging into cyclone.  At dice -3 he manages to put about 6 damage on it, after missing the charge attack on double 1's.

The mannikins on the right sprayed the sword knights missing everything and the ones on the left shuffle for position.  The wold warden drops another rift in my face.

Circle Turn 2


Turn 3

Turn 3 the swans decide to go big or go home.  The watchers are all sitting at arm 21 making them a hard target for this relatively pillow fisted list.  So the best way to get damage on them was through Bradigus himself.  Al didn't put up flesh of clay so any ranged attacks I can get on the B-man are going to hurt at his much lower arm 16.

I pull one from the squire and let snipe drop and allocate three to the cyclone.  Both arcane shields are upkept. Ragman starts the turn and moves forward and casts death field.  The centurion manages to three shot the watcher with one focus from Arlan and the charge from the jack marshal.  Sword knights pronto him back to clear a little room between my two jacks to keep them from getting killed together. 

Not taking any chances with range Sturgis puts snipe back on the cyclone for 1 focus (thanks arcane wonder) and camps the rest.  Rolling for shots on the cylone nets me 4 total.  Every shot connects and bradigus is forced into three transfers with one shot doing 1 damage to B-man himself.  In total about 14 damage is handed out to the wolds.  Eiryss moves forward as far as possible and comes up about 1" too short to clear synergy.

The hunter decides that now is a good time to be a champ and walks away from the watcher engaging him (Parry for the win!) and drops a crit brutal shot into brad getting the crit.  Using the boost from the jack marshal at dice -2 he drops 8 damage into Brad which gets transferred to the warden.  The gun mages drop an arcane inferno shot into brad for an additional 8 damage which Al elects to let Brad take.

Jr. steps up with his mighty Rat 4 and drops the ball needing a boosted 10 to hit.

Cygnar Turn 3

With the two watchers on the right out of coontrol Al clears all of the fury from the beasts on the left, upkeeps synergy and starts his turn.

Al was beginning to understand his earlier errors in pulling his brick apart and maneuvering was becoming a challenge for him.  In an effort to pull things back together and try to kill my heavies he uses his feat turn to slide 5" right.  He manages to build up a mighty synergy of 4 as one of the left watchers misses a gun mage.  One sword knight died on the right and thither toughs it out.  He jams Eiryss with the watcher and some mannikins.  At this point the Centurion is sitting at Arm 24 (native 19 + 2 shield + 3 arcane shield) but he doesn't have any choice but to go for it as attrition is swinging away from him.

The Guardian charges in with an angry angry glow in his eye but manages to swing with a set of double 1's for the big miss.  After that he gets his next blow to land the centurion is knocked down.  Three more swings at dice -3 leaves the jack with about half health and all of its systems. intact.  The warden comes charging in next and finishes the job.

The remaining shifting stones encircle Brad and Al elects not to use the second part of his feat.

Circle Turn 3


Turn 4

This is it.  The do or die turn for Cygnar.  Brad is sitting out in the open will all of his beasts full of fury.  I know I need to kill the guardian to deny transfers if I want any shot of killing Brad.

Sturgis pulls one from the squire and keeps it all.  AS is upkept on the knights.  Ragman starts the turn by shuffling over and using death field next to the objective.  Sturgis charges in within 3" of ragman and lays into the warden killing it.  After taking two unboosted swings at the guardian for 5 damage he then teleports back behind the objective.

At this point I'm not 100% confident that the sword knights can get the job done on the guardian so I use my hunter shot on Brad with the aiming bonus.  No crit this time but Brad still has to transfer about 7 damage to the wold.   Gustav moves up and drops 2 damage into a stone with his brutal shot.

Ruhpert pathfinders the sword knights and they get a charge run order.  5 of them get into melee with the guardian and one with Brad himself.  The guardian falls after only three knights take their flanking + 2 damage swings (thanks cyclone and ragman!).  Now the knight that charged Brad swings connects, and needs to roll a 14 on boosted dice to kill.  He only drops 2 damage into Brad but gets a B+ for effort. 

Now I'm scrambling as I should've shot brad with gun mages before engaging him (rookie mistake Dave).  No problem though as Arlan looks around and nods to Sturgis.  The sturge knows Arlan's got this.  He steps up and unleashes a SP8 blast of electricity needing a 9 to hit and nails it exactly.  Now the moment of truth, with 4 health left a damage roll of 8 is required and like a boss Arlan puts Brad down.

All hail the match all star:

All star spray for the win!

Cygnar turn 4 end game

So Brad's reputation of being brutal to play until you learn him holds up.  Even with the misplays on the brick though it was an absolutely brutal amount of boxes and armor to try and chew through.  If Al had kept casting flesh of clay on Brad I'm not sure how I would've played this.

I'm sure a rematch will be incoming soon though as the league play is just getting started. 

This game saw 6XP doled out to Al and another 7 to me.  Got that sweet sweet scope upkeep for Gustav so that maybe he can contribute next game.  YOU LISTENING GUSTAV!?  Get in gear or you're cut!

Until the next one.