Friday 28 August 2015

Body and Soul vs. Haley 3

Hello everyone! Been quite a while since I have been able to write a post on here, but I'm hoping to get them going on a fairly regular basis again. The report this week is between my forces of Cryx vs. Dave's Cygnar. The list that I am running is a fairly standard Body and Soul:

Wraith Witch Deneghra (*6pts)
* Deathripper (4pts)
* Deathjack (12pts)
* Nightmare (10pts)
Cephalyx Mind Slaver & 9 Drudges (5pts)
Cephalyx Mind Slaver & 5 Drudges (3pts)
Cephalyx Overlords (3pts)
Mechanithralls (Leader and 5 Grunts) (3pts)
Necrosurgeon & 3 Stitch Thralls (2pts)
Ragman (2pts)
Warwitch Siren (2pts)

This was my first time running with B&S, so I figured I would try out the standard list a few times before I start tweaking it around. This game was played post-errata, so enemy casters, jacks, etc... are now able to shake the effect from Denny's feat, making things much more dangerous for her on feat turn. (In the pictures, Alexia and some risen are proxying for a mind slaver and some drudges as I haven't been able to get my other unit yet).

Dave was running the following 50 point Cygnar list:

Major Prime Victoria Haley (*3pts)
* Lancer (6pts)
* Squire (2pts)
Lady Aiyana & Master Holt (4pts)
Rangers (5pts)
Storm Lances (Leader and 4 Grunts) (11pts)
Stormblade Infantry (Leader and 5 Grunts) (5pts)
* Stormblade Infantry Officer & Standard (3pts)
* 2 Stormblade Infantry Storm Gunner (2pts)
Trencher Infantry (Leader and 5 Grunts) (6pts)
Gorman di Wulfe, Rogue Alchemist (2pts)
Journeyman Warcaster (3pts)
Ragman (2pts)
Stormblade Captain (2pts)

This is a Haley 3 list that he has been trying with her for a while, and it seems to be really strong. The trenchers love the ability to put up their cloud wall and move back behind it, and revive on the storm lances is really powerful.

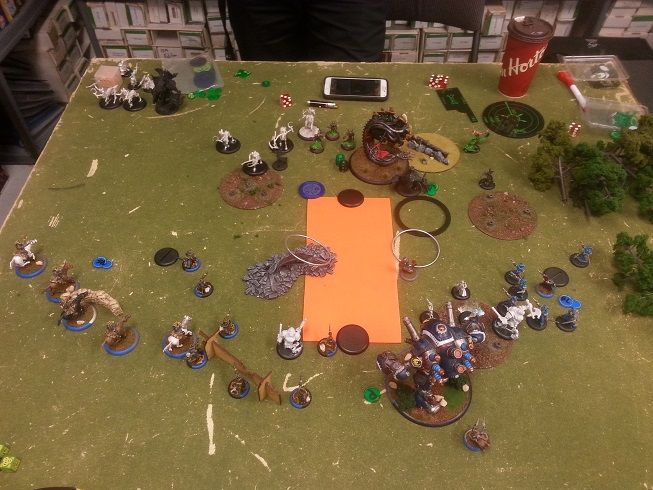
The scenario we were playing was recon. We rolled off, and I won the roll choosing to go first. Dave chose the side of the table mainly based on the fact that all of his models were already there, as the sides were fairly similar. For clarity, the pile of rubble that is in the zone was just being treated as rough terrain, and the grassy circles are forests (removed the trees sot that models could move around).
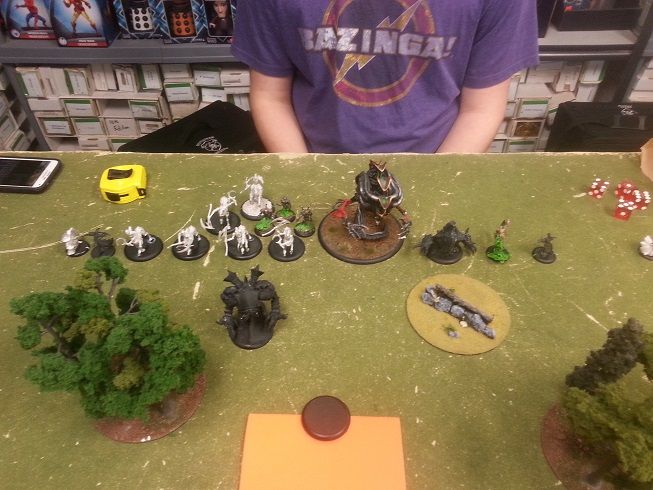
Cryx Deployment:
I forgot to take pictures of deployment, but it was fairly straight forward. I chose not to put up my upkeeps, as that is just giving Haley a free 3d3 of damage onto Denny. I deployed everything in a line, with Denny in the middle and Nightmare (prey went on Haley) to her right. The arcnode went to the left, with a warwitch siren and unit of overlords flanking either side.

The drudges, getting AD from the tier, went in the front, trying to spread out to cover as much of the table as possible, and Deathjack went in the middle to threaten the zone.
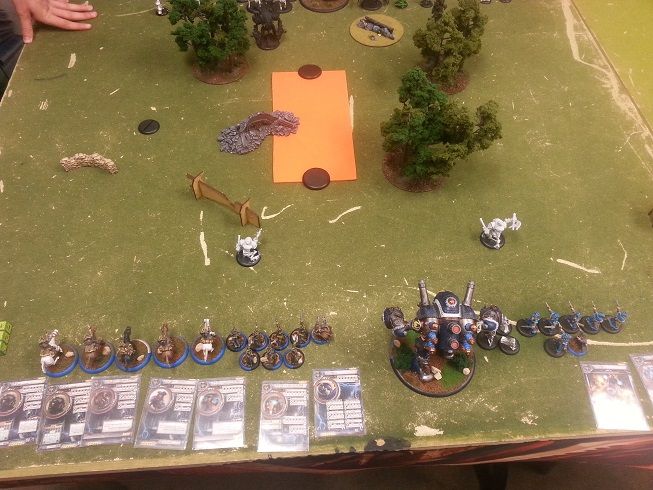
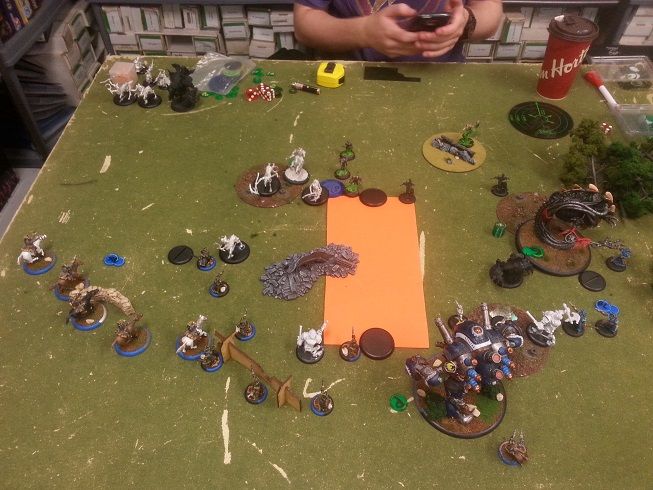
Cygnar Deployment:
I did squeeze in a picture of Dave's deployment, after he had moved a Ranger or two:


Trenchers and rangers in the front, haley in the middle with the stormblades. Storm Lances on my right, with the arc node on my left, and solos spread out in between.

Cryx Turn 1:
Everything ran. 

I knew that I was going to be getting shot to hell every turn, so I figured my best bet was to just run everything screaming at the other side of the table and hope that some of it lives to engage next turn.


Cygnar Turn 1: 
One of Dave's rangers runs its full speed to get in front of my army and get his bonus to shooting, and the rest of the unit moves up to get in a better position for next turn. The trenchers move up and take some shots killing a couple up drudges and putting up two clouds. The Storm lances and their solo flank really hard on my right side (after getting arcane shield from the journeyman) and the rest of the army moves up behind the trenchers. (Sorry, missed the picture again. Need to get back in the habit of taking them every turn.) Dave also cast out both baby haley and space haley this turn.
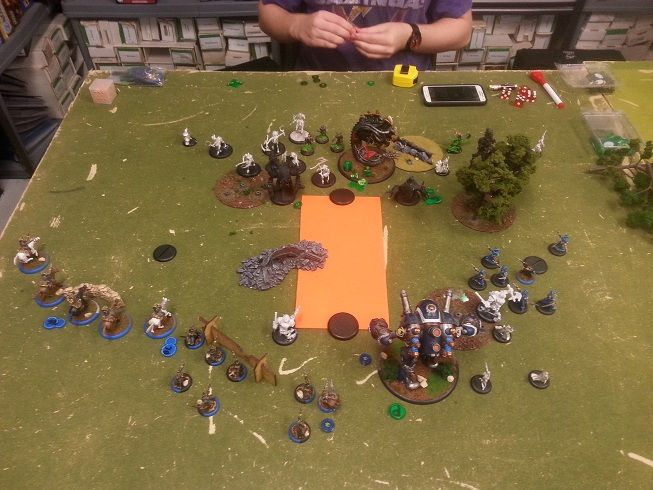
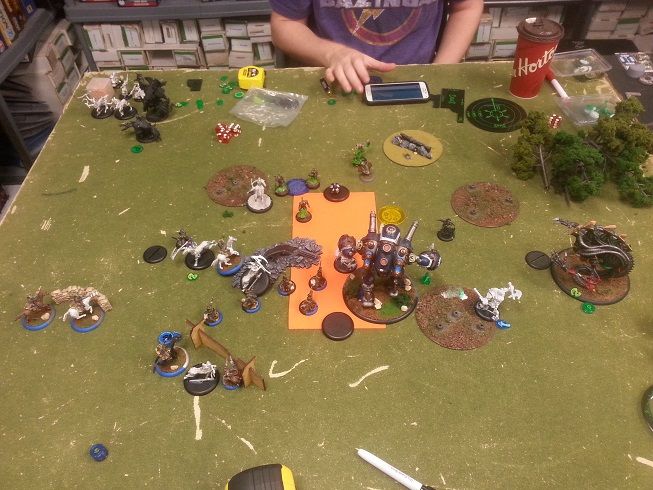
Cryx Turn 2:
A lot more running on my side. The warwitch siren on my right charged a storm lance, hitting it and shadow binding it in place and threatening a free strike on the lances on either side of the one she charged.

The drudges run forward to engage some of the shooting and be in the way, and they manage to take out a ranger. The warwtich siren on the left side walks forward and sprays down a second ranger. Deathjack and nightmare move up into a position to threaten anything that enters the zone (and to be in range of charging the objective next turn). Denny moves up behind the objective to get cover (using Valor) and getting ready to go into the zone next turn when I am able to score.


Cygnar Turn 2:
Dave upkeeps both of the Haley's, and arcane shield. Gorman walks up and throws a black oil at the warwitch siren but rolls max deviation and just misses her. The trenchers stand still and shoot down a stich thrall, denying me a lot of corpses, and then kill a bunch of drudges, some making their tough rolls but most of them dying. The storm blades receive and assault order and charge in, killing more drudges from the middle and left units. The rangers take a few shots, killing another few drudges, and the one in melee swings at the drudge in front of it but does nothing.

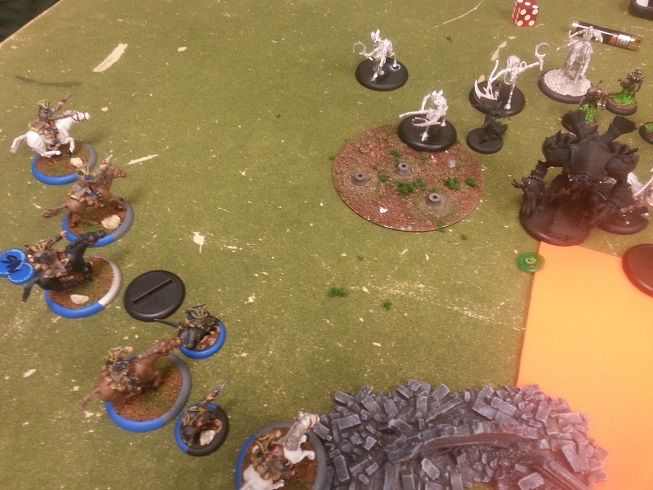
The Haley unit moves forward. Space haley casts ghost walk on the storm lances, allowing them to charge past the siren. Big Haley casts temporal flux (I think is the name?) giving models near a Haley +2 Def. Baby haley tosses out a chain blast and kills a few more models. The storm lances charge into the right unit of drudges, killing 3 drudges and the overlord from the unit, and also taking out an overlord from the unit in the back with lightening leaps. They also manage to take out all three stitch thralls on that flank, but one of the cav and the solo are both unable to kill the warwitch siren (the storm lance that was shadow bound ended up out of command and couldn't attack).
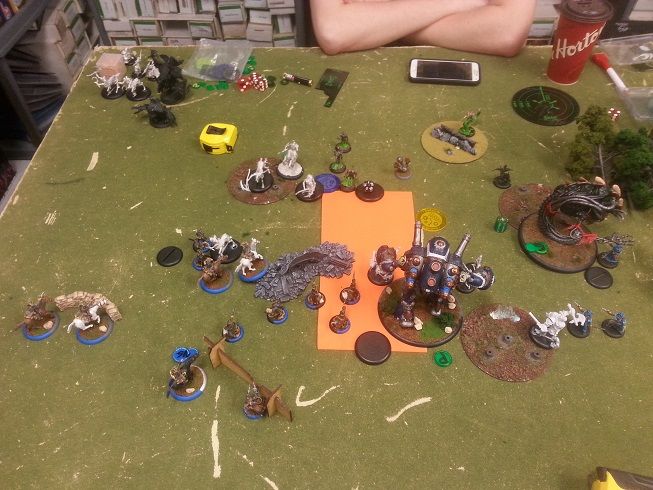
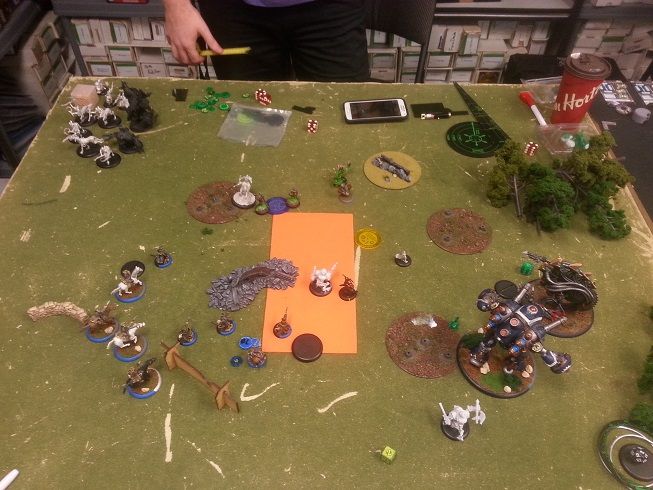

Cryx Turn 3:
At this point I have lost a lot of drudges, but not much else, which means that I am in a pretty good position. Denny keeps all of her focus and chooses to go incorporeal this turn. My middle drudge unit activates first, shuffling out of the way, and I choose to leave the middle drudge knocked down.

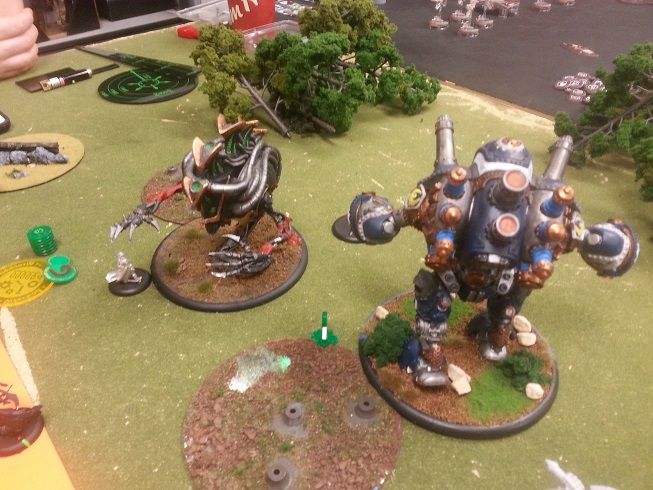
Denny moves forward through the objective and casts hellmouth on the knocked down drudge, and boosts to hit because I have had some bad experiences with double ones. She hits the drudge killing the drudge and the three storm blades in the zone. Death jack charges the objective and kills it easily. The overlords on the left side move forward and spray down two rangers and Gorman. The left drudges move forward to jam a bit more and kill another ranger. On the left side I made a mistake. What I should have done was have nightmare move up behind deathjack to block line of sight to Denny. What I did instead was have him move to the right and kill two storm lances. This was bad for two reasons. The first was that it left a straight line from baby Haley to Denny. The second was that it gave Haley two revive targets that would not be affected by the feat. Mechanithralls run forward into the zone after getting a few extra bodies from the necrosurgeons, and I end my turn with Denny dominating, putting me at three points.


Cygnar Turn 3:
Dave let Space Haley dropped, and activated Aiyana and Holy. Aiyanna gave magical weapoins to the trencher unit and they stood still and took a CRA on Denny, doing some light damage. Dave then had some of his models kill his models that were in the way (as they were stuck in place from the feat) and activated the Haley unit (spending a focus to shake the feat), popping his feat. Baby Haley charged a mechanithrall going right past deathjack thanks to incorp (as if he doesn't have magic weapons!) and blasts Denny in the face with a full boosted force hammer, doing a ton of damage to her. Big Haley charged deathjack and sends another fully boosted force hammer into Denny, killing her with focus to spare for another shot.


Victory to Cygnar!

I'm really happy with the way that the list played out. If I had played a bit safer there was a good chance that I could have stopped the assissination, and Dave wasn't able to get anything in the zone to contest (as the warjack was too far away). If Denny had lived I would have won on scenario, which would be my first win against Cygnar in a while.

As it stands I messed up and got her killed, but I really enjoyed the list, and I am looking forward to getting some more time with it on the table.

Until next time, thanks for reading!

Sunday 23 August 2015

List of the Week 1 - pCaine vs 3Denny

Its Dave back again, after a long hiatus, with another Beat Back battle report.  I had the pleasure of fielding the first challenge to my list of the week articles I'm posting over on the Sudbury Darkshard forums:  http://darkshard.ca/darkshard/viewtopic.php?f=35&t=4002.

My regular opponent Josh elected to throw down the gauntlet with an experimental 3Denny list.  The thought process being that pCaine simply wouldn't have the muscle to chew through a camping Denehgra. 

The lists:

David:
pCaine - Sons of the tempest T4

pCaine
- Stormwall

Gun mages
- UA
- Hunter

Gun mages
- UA
- Hunter

B13th
Blazers Full

Josh:
3Denehgra (proxied with a wraith engine)
- Skarlock Thrall
- Nightmare
- Deathjack

Daragh Wraith
2x Pistol Wraiths
2x Warwitch sirens
Gorman di Wulf

Withershadow combine
Soulhunters full

My list is fully explained in the link to Darkshard.  Josh built his Denny list to try and maximize her soul collection potential.  The theory being the more souls she pulls the harder she'll be to assassinate and the more she can bully the zones.

We set up for scenario #8: recon.  I won the roll electing to go first and then we're off to deployment.  (note all left and right references are from the cygnar perspective since I had the camera)


Cygnar Deployment:  The blazers were set up on the left flank in the hopes that they'd be able to hard flank and get at some of his squishier support elements.  Gunmages were deployed centrally and right flank to give me as much ranged coverage as possible.  Cain and the stormwall were set to charge right up the center in the hopes of a big feat turn and bullying the zone.  The advance deployed hunters were counter deployed to start lobbing shots into his jacks as soon as possible.


Cryx Deployment:  Josh set his soulhunters, Daragh, Gorman and a warwitch on the left flank to face off against the blazers.  Denny, nightmare and DJ were deployed centrally to attempt to control the scenario and on the right two pistol wraiths, the skarlock and a warwitch prepared to face off against the gun mages.

Turn 1: (I actually started my turn before taking the picture so the right gun mages were actually further back)


Typical turn one for warmachine with upkeep spells handed out and a lot of running for position.  For cygnar the blazers got snipe from Caine and blur went up on the left unit of gun mages.  Everything else ran and took positions as shown in the photo. 

For Cryx nightmare received grave wind from the skarlock and all other elements of his army ran for position with the soulhunters and deathjack using the forest on the left to cover their approach and the right hand solos doing the same on their side.  Denny moved forward her 9" and feated to give herself a big armor boost on turn 2.

Cygnar turn 2:


Caine upkept both spells and allocated 2 focus to the stormwall.  The gunmages on the right moved up just clearing the edges of the forest to get LOS to the pistol wraiths and promptly made short work of them.  Range 14 magic weapons are awesome for clearing incorporeal models.  The rest of the unit put thunderbolt shots into nightmare hoping for a crit knockdown which didn't happen.

The B13th moved up and attempted to land a flare on nightmare to open him up for a barrage form the wall and hunters.  The flare missed and deviated too far to be of any use.  Ryan dropped a mage storm which did clip nightmare for 1 damage. 

Failing to drop stealth on nightmare I knew that I had to switch gears and focus on deathjack.  If I failed to remove or at least cripple one of the jacks I was going to be in trouble next turn.  The huntner on the right moved up and dropped a snipe shot into Deathjack dealing a moderate amount of damage.  I misjudged the range on the left hunter and his shot landed short missing entirely.  The left gun mages moved up and were able to push Deathjack out of the forest and put a small amount of damage on him with the remaining shots.

Enter the blazers.  With snipe upkept on them these badboys are shooting at range 14" with a light cav movement of 5" after to get them to safety.  They stepped up and unloaded with the very first shot into death jack resulting in this:


Triple 6's for damage on the brutal shot.  That put 10 damage in Deathjacks column 5.  The leftmost blazer hit a soulhunter with the electroleap shot damaging it and leaping to Gorman removing him from the game.  The remaining 3 added more damage to deathjack and killed a soulhunter.  Stormwall was able to seal the deal with its first boosted damage cannon shot ending Deathjack and killing another soulhunter with the second shot.  Covering fire and the pod went down. 

Feeling pretty confident at this point I knew I just had to settle in and play smart attrition to bring it home.  So caine moved to the right and dropped blur on the clumped up gunmages to protect them from the warwitch spray coming their way next turn.  Def 18 is not an easy target.


Cryx Turn 2:

Faced with the loss of deathjack Josh had some difficult decisions to make for turn 2.  Denny got 14 focus with 7 extra coming from the souls her feat provided last turn.  Admonia upkept grave wind for free, Denny allocated 2 to nightmare and the turn began.

On the left the soul hunters ran/charged.  The one that was able to make it into combat whiffed his attack roll on the gun mage but managed to tie up both of them in combat.  The other two held back in forest with Daragh providing the -2 to damage rolls protection. 

The wither shadow combine moved up to contest the zone and cleared the stormpod.  The left warwitch ran to contest the zone the one on the right sprayed down Watts from the B13th.

Nightmare charged the right gunmages killing two.  The big question for josh was what to do with Denny.  Option 1 was charging my objective and removing it forcing me into contesting the zone or option 2: attempting to clear the right flag and start scoring.  He elected for option 2 and charged Denny in clearing 2 more gun mages including the UA but then stopping to preserve his armor camp against an anticipated charge from the stormwall.  Denny cast grave wind on herself and Josh passed the turn back to me. 


Cygnar Turn 3:

Caine upkept snipe and allocated 3 to the stormwall letting blur on the gun mages drop.  The gun mages on the right thunderbolt shot nightmare attempting to knock him down but only succeed in pushing him towards the zone.  Between two armor piercing hunter shots and the stormwall nightmare is destroyed.

The gun mages and blazers on the left manage to bring the cryxian objective down to 1 health and miss all of the other shots directed at the soulhunters and wither shadow combine.  Caine moves back to the right and teleports to safety behind the wall.  Passing the turn back to Josh.


Cryx Turn 3:

Seeing an opportunity to try and finish the game Josh goes for it.  Gravewind is upkept by admonia and Denny holds all of her focus. 

On the right Denny clears out the remaining gun mages with her melee attack and a well placed scourge also knocking down the hunter.  The hunter is a couple millimeters out from contesting the flag so Josh will score one point.

The warwitch siren moves in and sprays down Ryan of the B13th missing Lynch.  In the center of the board the withershadow put a good amount of damage on the hunter there crippling both arms.

Now Josh makes his play and goes for the kill.  The skarlock moves over and casts ghost walk on the soul hunters.  They then receive incorporeal from daragh when they activate.  The forward soul hunter charges caine over the wall taking no free strikes thanks to ghost walk.  The other two charge the blazer and a gun mage.  After all of the movement is done we measure and the soul hunter that charged Caine is 3/4 of an inch out of command and can't make its attack.  *phew* bullet dodged.  Given the low armor on Caine and the fact that I wasn't camping any focus that charge had the potential to end the game.  The other two soul hunters kill a blazer. and then light cav move to bring the other soul hunter into command ending the cryx turn.


Cygnar Turn 4:

Cygnar turn 4 is the beginning of the end for Josh.  Caine lets all of the upkeeps drop and allocates 3 focus to the stormwall. 

On the right the hunter sacks action to stand up and moves out of the way.  Lynch steps up and kills the warwitch siren avenging his fallen comrades.  The stormwall charges Denny and has to boost to hit as she's sitting at defense 17 so he needs 11's to hit.  He sticks the charge attack and at dice +1 does 8 damage.  I boost to hit on the second attack and only roll a 9 meaning we're headed into Cryx turn 4.

On the left the blazers clear the rest of the soul hunters from the board and kill the cryxian objective.  Caine moves in to dominate the zone and the gun mages kill the withershadow combine member making 1-3 for Cygnar.


Cryx Turn 4:

Sensing the scenario turning against him Josh attempts to run Denny back into the center of the board to help out risking the free strike from the stormwall.  Unfortunately for him I roll the hard 9 needed to hit and do 10 damage on the boosted damage roll to put Denny in the dirt.

Final result Cygnar Victory!

Thursday 9 April 2015

Two Games: Cryx vs. Cygnar

Hello again! Time for another battle report (Two, actually!), this time Cryx vs. Cygnar. It has been a while since I have brought my Cryx out, but I'm ready to get back in on some undead action and hopefully win some games! My biggest problem with Cryx has always been getting my whole army wiped off of the table. This time, I decided to try out some lists that I thought would stand a better chance against the average gun line.

I had been giving some thought to ADR, and figured that I would try out a Scaverous list with specialists swapped in to be what I though would have a good chance against Cygnar. The list looked like this:

Lord Exhumator Scaverous (*5pts)
* Deathripper (4pts)
* Skarlock Thrall (2pts)
Bane Riders (Leader and 4 Grunts) (11pts)
Bane Thralls (Leader and 9 Grunts) (8pts)
* Bane Thrall Officer & Standard (3pts)
The Withershadow Combine (5pts)
Aiakos, Scourge of Meredius (3pts)
Bane Lord Tartarus (4pts)
Warwitch Siren (2pts)
Wrong Eye & Snapjaw (9pts)

The general idea being thralls + death ward will survive pow 10 shooting (or electrical damage) much more often then usual, the riders can shrug off most of it and Snapjaw can just submerge. Aiakos is there as just a power solo, smacking things that need to be smacked and Scaverous is assisting where he can with telekenisis and his debuffs.

Now, of course, some of that might have actually been true against a normal gun line. But Dave, my Cygnar opponent, was testing out one of his SOO lists, which happened to be Nemo 3.... who eats Cryx for breakfast. Still, I was hoping that the list could pull through against his list which consisted of the following:

Artificier General Nemo (*3pts)
* Stormwall (19pts)
Storm Strider (9pts)
Storm Lances (Leader and 4 Grunts) (11pts)
Major Katherine Laddermore (5pts)
Stormblade Captain (2pts)
Stormsmith Stormcaller (1pts)
Journeyman Warcaster (3pts)
Reinholdt, Gobber Speculator (1pts)

Well then... pow 10 damage rolls are bad, boosted pow 10s are terrible, and I knew that this was probably not going to go well. We rolled for scenario and got recon, the new scenario for 2015. I won the roll off and decided to go first, hoping to get up the board before getting shot to death.

Thanks to a four hour game from last week we have decided to start playing on a clock to speed up our game times. So I set my clock to an hour and started my deployment.

Cryx Deployment:
I deployed everything fairly centrally on the board, getting ready to run up the field. Scaverous went right in the middle, with the bane thralls on his left and the riders on his right. Wrong Eye, Snapjaw and BLT went on the left side, with the withershadow combine and Aiakos on the right. An arcnode went down each flank to get spells where I needed them, and it Dave's turn to deploy.

 photo 0.1 - Cryx deployment_zpsfg4wiymo.jpg

Cygnar Deployment:
On the Cygnar side, the two huge bases went on the left. Nemo and his support staff went in the middle, the cavalry went to the right, and the storm callers spread throughout the lines for maximum coverage.

 photo 0.2 - Cygnar Deploy_zpsa7nrkhwj.jpg

Cryx Turn 1:
As per usual, everything ran. The bane thralls got death ward, as I was hoping it would save them from some lighting, and everything else ran as far forward as they could to try and get in a good position for next turn.

Cygnar turn 1:
On the Cygnar side things were a bit more exciting. The storm strider walked forward, shot at my front most bane rider and managed to kill it. The stormwall walked forward and put down covering fire and a storm pod, as the storm wall tends to do. 

Nemo put fail safe on the storm wall, the journeyman put arcane shield on the storm strider, and everything else ran forward.

 photo 1 - turn 1_zps1r794qjn.jpg

Cryx Turn 2:
Unfortunately, as things were standing, nothing was in my charge range. This meant that I had to either advance in range of his guns or give up a ton of scenario presence, so I guess it was time to see just how much of a beating the list could take.

The combine upkeeps deathward for free and the bane thralls activate, running forward. I tried to spread them out to lower the amount of casualties, but it is almost impossible to avoid the 4" lightening leaps. Scaverous advanced forward and cast telekenisis onto one of the bane riders to move it forward two inches. It then ran up into the face of the two huge bases, hoping to hold at least one of them up on Dave's turn. Aiakos advanced in the back, camping all of his focus, while on the other flank WE&S both advanced and cast submerge in order to avoid being shot. Everything else advanced cautiously the back, trying to stay out of range of the guns, and that was the end of the turn.

 photo 2.1 - Cryx Turn 2_zps808u1hqf.jpg

Cygnar Turn 2:
Now, I don't remember exactly what models killed what, but I do remember a lot of things dying. Nemo activated first, moved up and popped his feat. He then shot with his gun and bought two chain lighting spells, frying a bunch of bane thralls (hopping leaps off of non-stealthed things to hit them). The storm wall and the storm strider wiped out the bane riders, Aiakos and the arcnode on that flank. The storm callers moved up and used triangulations to kill more bane thralls.

The cavalry charged in and did a bunch of damage, leaving Wrong eye on 4 boxes, snapjaw with two systems down, and killing BLT.

 photo 2.2 - Cygnar Turn 2_zpsephrazvu.jpg

Cryx Turn 3:
Well, things were looking pretty bleak from the Cryx side of the table, but I still wanted to see what I could do.

Wrong eye activates first, using two fury to heal snapjaw and then taking a swing at the storm lance in front of him, not killing it. Scaverous activates and feats this turn, as there is no reason to hold onto it. He uses telekinisis to bring Wrong eye back behind the wall to keep him protected, and buys a second one on the storm lance that wrong eye attacked. He misses, so he buys another one and hits, moving the model out of the way and rotating it so that my banes won't take free strikes.

Snapjaw activates and clears out the two storm lances in front of him, healing up a few points of damage. The bane thralls activate and charge killing another two storm lances. The WCS move up and use their shots to kill the stormblade captain, and the siren moves up but misses it's attack on the storm caller.

 photo 3.1 - Cryx turn 3_zpsv8ksddvp.jpg

Cygnar Turn 3:
And this turn, everything else in my army gets shot to death. Lots of lighting leaps, the last storm lance killed wrongeye, taking both gators off of the table. The stormwall had to punch a storm pod that was in front of it as it was blocking its path, so it didn't move this turn. 

After the clean up, Scaverous, the war witch siren and a disrupted arcnode was all that was left on the Cryx side of the table.

 photo 3.2 - Cygnar turn 3_zpsmkummkwp.jpg

Cryx Turn 4:
Scaverous charges over and kills the last storm blade. The warwitch sprays down the storm callers killing one, and the arc node tries a bite on Laddermore but misses.

 photo 4.1 - Cryx Turn 4_zpsoquzwgs1.jpg

Cygnar Turn 4:
The stormwall charges into my objective, killing it. The storm strider moves forward to make a wall for Nemo. My jack gets disrupted and damaged, and the warwitch siren is killed. With nothing on my side to contest, and no way to kill Nemo, Dave scores 3 points on his turn and 2 on my turn for a scenario win.

 photo 4.2 - Cygnar turn 2_zpsa666q3iv.jpg

Thoughts on the game:
Well, that could have gone better. I have yet to find a Cryx list that I can drop into Nemo and still have a list left after his feat turn, but I'm going to keep looking. I think that I definitely need a Kraken in the list, as something that won't die to lighting leaps and something that can't be disrupted, but other than that I'm not too sure. 

Game 2:
We still had quite a bit of time after this game, since playing on the clock sped us up a lot, so we decided to play again. We used the same scenario, but this game was eSkarre vs. Seige. I wanted to try a jack heavy list to see how that fared against Cygnar, and Dave wanted to see if his Seige list would be able to deal with Cryx. This ended up not being a super long game, so the report will be pretty quick.

The list I played:

Skarre, Queen of the Broken Coast (*6pts)
* Deathripper (4pts)
* Deathjack (12pts)
* Nightmare (10pts)
Bane Thralls (Leader and 9 Grunts) (8pts)
* Bane Thrall Officer & Standard (3pts)
Satyxis Raiders (Leader and 9 Grunts) (8pts)
* Satyxis Raider Sea Witch (2pts)
The Withershadow Combine (5pts)
Satyxis Raider Captain (2pts)
Warwitch Siren (2pts)

The list that Dave played:

Major Markus 'Siege' Brisbane (*5pts)
* Stormwall (19pts)
* Squire (2pts)
Lady Aiyana & Master Holt (4pts)
Rangers (5pts)
Tempest Blazers (Leader and 4 Grunts) (10pts)
Eiryss, Angel of Retribution (3pts)
Journeyman Warcaster (3pts)
Lieutnant Allison Jakes (3pts)
* Charger (4pts)
Stormsmith Stormcaller (1pts)

Dave won the roll and decided to go first, and I just stayed on the side that I was already on.

Cygnar Deployment:
Siege deployed right in the middle, with the Stormwall on his right, as well as Jakes and her warjack. The rest of the army went on the left side of Siege, with the rangers advance deploying in the center of the table.

 photo 0.2 - Cygnar Deployment_zpsnpwgahfn.jpg

Cryx Deployment:
Skarre went in the middle, with her battlegroup on her left, lined up with the stormwall. The banes went to her right, with the Satyxis raiders in front of them, hoping to jam the guns and keep the banes alive. Nightmare puts prey up on Siege.

 photo 0.1 - Cryx deployment_zpsgpjkvljf.jpg

Cygnar Turn 1:
Everything runs forward, arcane shield goes up on the stormwall from the journeyman and Jakes casts sidekick onto her jack.

Cryx Turn 1:
Again, everything runs forward. Skarre puts death ward onto Nightmare and Admonition onto Deathjack. The raiders move forward, getting ready to jam, and the banes move up behind them.

 photo 1 - Turn 1_zpskhefhghv.jpg

Cygnar Turn 2:
The rangers move forward to give their +2 to hit bonus out to their army. A few of them shoot and kill one or two raiders. The Stormwall and the charger both shoot at nightmare, putting a ton of damage into him but not killing him (and only crippling one arm, thanks to deathward), and the stormwall also drops a pod into the zone. The blazers and A&H move up and kill the raider captain, the UA and most of the raider unit.

 photo 2.1 - Cygnar Turn 2_zpsfkvdgagb.jpg

Cryx Turn 2:
Well most of my raiders are dead, but I'm pretty sure I can end the game here. I drop death ward on Nightmare, upkeeping admonition for free. Three focus goes to Nightmare, Deathjack gets his two plus Skarre gives him one more, and she keeps the rest. Skarre activates first, and pops her feat in case my plan doesn't work, putting it on herself, DJ, Nightmare and the arcnode. 

She casts perdition onto the ranger in the front, hitting without boosting (although she had a focus to boost if needed), killing the ranger and letting nightmare make a full advance.

Deathjack moves up and casts perdition as well to kill the stormpod that is in the way. With that done Nightmare makes a full advance (thanks to the speed bonus from prey) getting in range of Siege and with the prey bonus is easily able to kill him.

 photo 2.2 - Cryx turn 2_zpsq7ios8wx.jpg

Thoughts on the game:
Well, this didn't really test either of our lists much. If the rolls had gone a little bit differently, or if I had decided to switch the upkeeps between DJ and Nightmare, Nightmare could have easily died and this would have been a longer game. I still don't know what I can bring to really counter Cygnar, but having some big jacks that could take a hit really helped. 

That's all I've got for now, and there probably won't be another report up for at least two weeks as I am going into exams right now. But I'll try to get another one up when my exams are done.

Sunday 5 April 2015

Riven Bonds League Game 7: Mordikaar vs Issyria

Hello again! It is time for another report. It's been a while, but we're back with another game for the league, and another trial game with Skorne this time against Mat's forces of Retribution. I finally put together the models I needed for a solid 50 point list, in this case a Mordikaar list that I am really excited to try out. The only models from this list that I have used before are the nihilators and the beast handlers (Well and I guess the Swamp Gobbers from when I owned Circle a few years ago) so this was going to be a fun trial!

Void Seer Mordikaar (*5pts)
* Basilisk Drake (4pts)
* Basilisk Krea (4pts)
* Tiberion (11pts)
Cataphract Cetrati (Leader and 5 Grunts) (11pts)
* Tyrant Vorkesh (3pts)
Cataphract Incindiarii (Leader and 5 Grunts) (9pts)
Nihilators (Leader and 9 Grunts) (8pts)
Paingiver Beast Handlers (Leader and 3 Grunts) (2pts)
Swamp Gobber Bellows Crew (Leader and 1 Grunt) (1pts)
Agonizer (2pts)

I think the list seems very strong against a lot of drops, and I think I am going to have a lot of fun playing it. It is very heavily borrowed from Martin Hornacek, because he is a very strong player that I have a lot of respect for, and I am still very new to Skorne so borrowing lists is very helpful. With that being said, I have Incindiarii in the list which he does not, which I think makes the list a bit more diverse giving it some ranged presence, but I'm sure he has a good reason for not taking them in his main list.

This list struggles against upkeep removal, remove from play and heavy armor. The first two because it messes with Mordikaar's attrition game, and it has issues with heavy armor because nothing in the list hits extremely hard, except for the Cetrati (of which there are only 7, with a small threat range) and Tiberion. While I definitely feel like Tiberion can handle a heavy without a problem, he might have issues with say.... a character heavy and a colossal.... theoretically...

 Issyria, Sibyl of Dawn (*6pts)
* Hyperion (18pts)
* Imperatus (12pts)
Houseguard Halberdiers (Leader and 9 Grunts) (7pts)
* Houseguard Halberdiers Officer & Standard (2pts)
Mage Hunter Strikeforce (Leader and 5 Grunts) (5pts)
* Mage Hunter Commander (2pts)
Arcanist (1pts)
Arcanist (1pts)
Dawnguard Destor Thane (4pts)
Houseguard Thane (2pts)
Mage Hunter Assassin (2pts)

Oh look, a character heavy and a colossal! Who saw that coming?

I am always worried when I see Issyria on the other side of the table. I know that she generally dies off after her feat turn, but damn it's a good feat turn, and I usually end up not having an army left after it is done. This is of course speaking from Cryx and Merc experience, so I am hoping Skorne will be able to whether (weather? whatever) the feat better, but we will see how it goes.

We rolled off for scenario and ended up with two fronts. Mat won the initiative roll and chose to go first.

Retribution Deployment:
Hyperion pre-deployed slightly to the right side of the table (Mat's left side), with Imperatus and Issyria going in the middle. The halberdiers went to Imperatus' right, with the thane beside them and an arcanist beside each warjack. The destor thane when to the left of Hyperion, with the MHA deploying in front of him and the strike force deploying in front of the halbs.

 photo 0.1 Ret Deployment 1_zpsz663fnvr.jpg

Skorne Deployment:
I deployed with my battle group right in the middle. The cetrati went on the right side to try and contest my zone, while the nihilators and incindiarii went to the left side of the table to deal with the halbs that would be coming towards me, as they wouldn't be much help on the other side against the hyperion. The beast handlers went in the back, as support units do, and the agonizer went off to the right side so it could try and deny some focus allocation to the hyperion.

 photo 0.2 Skorne Deployment_zpsu3k0c0ec.jpg

Retribution Turn 1:
As expected in warmachine turn ones, there was a lot of running. Basically everything ran forward except the thane which gave desperate pace to the halbs, the arcanists which each gave a focus to their warjack and Issyria who cast admonition on Imperatus and inviolable resolve onto the hyperion.

 photo 1.1 Ret_zpsdbfaqz54.jpg

Skorne Turn 1:
Again, nothing super exciting, a lot of things ran. I considered taking some shots with my incindiarii but decided that it would probably better if I got them into a stronger position for next turn. The krea but up its animus and charged, the nihilators and cetrati ran. At this point Mat (and some on lookers) was giving me raised eyebrows, since I just moved my whole army into his threat range, but I had a plan! (Sort of). Mordikaar activates, walks forward and casts hollow onto the nihilators and dumped the rest of his fury onto the agonizer. Then he popped his feat, giving everything in my control area (which was everything except the incindiarii on the far left) +3 defense and poltergeist. The support staff ran forward, and I was done. (For the record the two empty bases on the field are a nihilator and a cetrati that fell off of their bases as I was unpacking them).

 photo 1.2 skorne_zpskhiwycsu.jpg

Retribution Turn 2:
Mat spent some time deciding if he should back up and let my feat drop, or if he should counter feat and try to get some work done. In the end he decided to counter feat, and started his turn by activating Issyria floating over to the left and popping her feat. She then cast crusader's call and gave Impy an ancillary attack, which he used to shoot a nihilator, hitting and killing it. The strike force activates, with a few of them standing still and the rest moving forward to take some shots at the nihilators. The feat helped them hit, and they ended up killing a few of the nihilators.

Next the halberdiers receive desperate pace from the thane, pop their mini feat, and charge my incindiarii. Thanks to the feat and some good rolling, they manage to kill all but one of the models in the unit, and the last one only survived because the halbs couldn't get a line to charge it. Then the halberdiers used reform to back up a bit and contest the zone, while a couple of them moved farther forward to jam my remaining models.

Imperatus and the hyperion both move forward and take some shots, but neither of them did anything game changing (I think the hyperion just put a couple of points of damage on the drake, but I don't remember exactly), although Imperatus did light Tiberion and a nihilator on fire after killing another nihilator. The mage hunter assassin charged one of my cetrati, easily killing it, and the destor thane moved forward and used its gun to kill a nihilator or two.

In total by the end of the turn I had lost 6 nihilators, giving Mordikaar 6 souls, as well as 5 incindiarii and a cetrati. I wasn't expecting to loose as many incindiarii as I did, but one lived which the most important part, and it was time for some payback.

 photo 2.1 ret 2_zpsize8u2kc.jpg

Skorne Turn 2:
Neither of the fires go out, but the nihilator makes his tough roll and Tiberion takes no damage. Mordikaar leeches in his fury, upkeeps hollow and the turn begins. Mordikaar activates first, and uses all 12 of his fury to cast revives. He brings back three of the incindiarii that died, as well as the one cetrati that was killed by the mage hunter. The incindiarii activate, and take some shots. The one in melee takes a swing at the halb in front of him, hitting and killing it, and the rest of them shoot into the blob of halbs in the middle of the table, killing a few of them and lighting a few more on fire. The nihilators activate and shuffle around to make sure they don't have any friendly models in their melee range, and then they kill the three halberdiers in front of them.

The cetrati go next, receiving a shield wall order and shuffling forward. The revived cetrati takes a big hit on the destor, bringing him down to two boxes, and then Vorkesh proceeds to miss his attack. Two of the cetrati in front of the mage hunter try a CMA on her and miss, and another one swings by itself and misses as well (the fourth one couldn't get in melee range).

The drake walks forward, staying out of melee with the destor, and sprays a line down the strike force. He catches two grunts and the UA, boosts to hit on all three, and misses all three attacks. Next the agonizer starts screaming and running around in a way that only an agonizer can, ending up in the middle of the board and hopefully in range to deny focus allocation to both Imperatus and the hyperion. Tiberion and the krea both move forward to get in a better position for next turn, and both use their animi to try and help survive through the next turn. The beast handlers move forward but don't do anything, because I'm right where I need to be for fury, and the gobbers move up and drop a cloud to try and block LoS to Mordikaar.

 photo 2.2 Skorne_zpsalwjpugo.jpg

Retribution Turn 3:
Issyria upkeeps both of her spells, and then we do some measuring to see if he can allocate focus or not. Both warjacks are within the agonizer's bubble, so there is no focus allocation this turn. Mat wants to get rid of the agonizer, so Imperatus activates first, and walks forward to kill the agonizer. He kills it easily, and then sidesteps backwards to get back into the zone, and to get away from Tiberion. With that out of the way an arcanist activates and gives hyperion a point of focus. 

Hyperion activates and charges forward (with a free charge from Mat's fuel cache objective), easily killing three cetrati with it's initials and a purchased attack. The mage hunter swings at a cetrati, but doesn't manage to kill it. The strike force moves forward, use some shots to clear out a few beast handlers, and take a few swings on the drakes, doing some light damage. The thane also takes a swing, hitting the krea but not crippling any systems.

The halbs move forward and kill two of the incindiarri. Finally Issyria activates, ancilliary attacks Imperatus, getting him to kill a nihilator, and then uses her spell that lets her move to fly away and hide.

 photo 3.1 Ret 2_zps8vdazqcu.jpg
Sorry for the dark picture here.
Skorne Turn 3:
Mordikaar leeches in his fury and upkeeps hollow again. He moves forward an casts ghost walk on the drake, as well as casting a revive to bring back a cetrati.

The krea activates and shuffles around the thane, staying in it's melee range and also getting in the way of hyperion (and contesting the zone). Using the flank bonus from the drake, the krea is able to easily kill the thane, and takes a swing at hyperion as well but doesn't do any damage. Next the nihilators move up and take some swings, killing a mage hunter or two and clearing a bit of room. The drake backs up (not taking free strikes thanks to ghost walk) and lines up another spray. Boosting to hit again, this one manages to kill the UA and two strike force members. 

Tiberion moves forward and uses his bump animus, while the incindiarii try to kill the halbs engaging them but both wiff their melee attacks. Two of the cetrati CMA the mage hunter assassin, finally killing it, and the other two charge the hyperion, doing a bit of damage to it. Finally, the gobbers move forward an pop a cloud (which happened after the picture below) and the turn moves over to Ret.

 photo 3.2 Skorne 2_zps0yfbucrc.jpg

Retribution Turn 4:
On the retribution turn both warjacks get loaded with focus and the turn begins. The arcanists move forward and give their jacks concentrated power, and then Hyperion activates and squishes all four cetrati. He missed one attack, so he couldn't swing at the krea at all, but some strike force members charge it in the back, doing some more damage but not managing to kill it.

The other strike force take some swings in melee, and along with the halb standard bearer, try to make a bit of a wall for Imperatus. The other halb members manage to kill a nihilator and an incidiarii, and then Imperatus actiavtes. He walks forward into melee range of Tiberion, with a model behind him to prevent being bumped away, and begins swinging. 

In the end he did a ton of damage to Tiberion, and crippled two aspects, but is unable to kill him. With nothing else to attack Tibbers, Mat ends his turn and it's time for some revenge.

 photo 4.1 Ret 1_zpszgj0t8bi.jpg

Skorne Turn 4:
At this point, things are looking pretty bleak for the forces of Skorne. Looking at the board, I'm thinking that my best bet at this point is to try and clear the zone on the left and then sprint Mordikaar over there. With that in mind, Mordikaar leaches his fury, drops hollow, and begins the turn.

Since I wanted to be able to run Mordikaar to the zone, I needed to have the beast handler heal Tiberion. Unfortunately this meant no enrage, but I would have to hope for the best. The handler moves up and brings Tiberion back to full functionality, and then Tibbers activates and goes to town on Imperatus. After taking all my attacks and filling up on fury, Imperatus was still alive, but my final hit was a crit. Using this I slammed Imperatus backwards, killing the standard bearer, and knocking down Imperatus. My nihilator moves forward and kills the strike force member in front of my drake, freeing him up. The drake then moves forward and sprays Imperatus, catching him and the thane in the spray. With some boosts I manage to kill both the thane and Impy, but then Imperatus uses his once per game ability to regenerate. Man I hate that ability.

Since I won't be able to clear the zone this turn, I go back into spell casting mode with Mordikaar, casting two revives to bring back some incidiarii. They kill one of the halbs and get ready to take some shots next turn. The krea kills a strike force member, leaving a fury spot open for transfers, and the gobbers back up and pop a cloud. 

 photo 4.2 Skorne_zpshise05jg.jpg

Retribution Turn 5:
Nothing Super surprising happens this turn. Hyperion and Imperatus both recieve focus, and begin clean up duty.

Imperatus moves forward and kills Tiberion, while the hyperion moves forward and kills both basilisks. The remaining strike force members move forward and kill the gobbers, and a halberdier kills the last beast handler.

 photo 5.1 Ret_zpsenpksgau.jpg

Skorne Turn 5:
On my turn, I'm down to a last ditch play to try and pull out a win. Mordikaar buys two revives, bringing back two more incindiarii, and they move forward as far as they can. One of them kills an arcanist that was in the way of drawing a line to Issyria, and then I begin lobbing AoEs at Issyria. None of them are able to drift the right way, so my turn ends and Imperatus walks up to Mordikaar, easily putting him into the ground.

 photo 5.2 Skorne End_zps6aghuraq.jpg

Victory to Retribution!

Thoughts on the game:
Well, I am happy with the way the list performed. It definitely doesn't have the hitting power to deal with Imperatus and a Hyperion, but it was able to grind it out anyways. Revive is an amazing spell, especially with hollow, and I really enjoy being able to bring models back to whichever side of the battle field needs the support.

I'm looking forward to playing some more games with Mordikaar, and hopefully next time I can pull out the win!

As a side note, this game ended up taking over four hours, due to some distracting conversations going on throughout the game. After this I think we are going to start playing our games on the clock. Not only will in reduce game time, allowing us to get in extra matches, but it will also start preparing us for the death clock we will be seeing at the Southern Ontario Open.

Monday 16 March 2015

Riven Bonds League Game 6: eMakeda vs pStryker

Hello again!

Got in another league game the other night, this one a 25 point match vs. Dave's cygnar. My all-in-one box finally came in, and I was excited to finally get to play a game with beast handlers! (How I have gone without them this long I have no idea). For two points (or three in this case, because I don't have a one point filler) they bring so much utility, I can't see any reason to not bring them in a list. With the all-in-one box also came eMakeda and Molik Karn, so I decided to bring them out as well. With those three things, a gladiator and a unit of nihilators, I ended up with this list:

Supreme Archdomina Makeda (*5pts)
* Molik Karn (11pts)
* Titan Gladiator (8pts)
Nihilators (Leader and 9 Grunts) (8pts)
Paingiver Beast Handlers (Leader and 5 Grunts) (3pts)

Dave, trying to keep up his streak of a new caster every game, decided to bring out pStryker. Stryker is looking a little small and girly this game, because secretly Stryker is pKaya (that's what happens when you leave models at home!). Trying to rebuild his list by memory (and pictures!) I'm coming up with the following list:

Commander Coleman Stryker (*6pts)
* Lancer (6pts)
* Stormclad (10pts)
Silver Line Stormguard (Leader and 9 Grunts) (9pts)
Stormblade Infantry (Leader and 5 Grunts) (5pts)
* Stormblade Infantry Officer & Standard (3pts)
* 1 Stormblade Infantry Storm Gunner (1pts)

Which is actually 28 points of Cygnar. I am assuming that the Silver Line unit was actually supposed to be a minimum unit, which would bring the list down to 25 points, but he definitely had 10 of them on the table. Whoops.

Anyways, the scenario that we played was destruction, and Dave won the roll and chose to go first. I picked the side of the table with a wall on it, and it was time for Cygnar deployment.

Cygnar Deployment:
Dave deployed with the silver line stormguard in the front, and the storm blade infantry behind them. The jacks went to their right and pKaya... I mean Stryker... went and hid behind them like the girl he/she is.


Skorne Deployment:
Fairly simple deployment on my side. Makeda went in the middle so that she could cover the army with road to war. The nihilators deployed to her left with her warbeast to her right, and the beast handlers went in the back.


Cygnar Turn 1:
Stryker gave a focus to the lancer, and then everything ran forward. The stormclad used its free focus from the stormguard to run forward and then Stryker walked up. He cast arcane shield on the stormclad and snipe onto the stormblade infantry.


Skorne Turn 1:
Similar to Dave's first turn (and most warmachine turn 1's) everything ran forward. Makeda cast road to war and put leash onto Molik, and moved foward. The nihilators ran up to the zone, with two of them getting into the zone thanks to road to war. The warbeasts both riled and ran, and the beast handlers just ran forward to keep up with the beasts.


Cygnar Turn 2:
Stryker upkept both spells and kept the rest of his focus. The stormguard went first and issued a charge run order. A few of them charged the front three nihilators, killing all three, and the rest just ran to get in a better position, and going base to base for their no-charging ability.

The lancer walked forward and then Stryker activated and moved forward just enough to be within the kill box. He arced an earthquake through the lancer, knocking down three of my nihilators, and then popped his feat giving his army plus 5 armor. The stormclad just moved forward, and then the stormblade infantry walked forward and took some shots, and managed to kill one more nihilator.


Skorne Turn 2:
Makeda pulled in her fury, upkept leash, and then I activated the gladiator. He walked forward a bit and cast rush on Molik (Wasn't just if he needed it, but why not), and then the beast handlers moved forward and pulled the fury off of the gladiator. One of the handlers enraged Molik for the free charge, and then he charged one of the silver line that was not base to base. With side step and two purchased attacks, Molik killed 4 of the silver line. He ended up without any more models within his reach, so he used his animus, fatewalker, and ended his activation.

Makeda shuffled forward a little bit to get out of the kill box, and allowed Molik to use his leash movement to move 3" back towards my line. She then cast road to war for the extra movement on the nihilators and she was done. The nihilators moved forward and thanks to Stryker's feat (and the fact that three of them were knocked down) managed to kill a grand total of one stormguard. With that I ended my turn and Molik used his fatewalker move to walk back behind my line of nihilators.


Cygnar Turn 3:
Stryker again upkept both spells, and kept the rest of his focus. The lancer moved forward and killed a nihilator, and then everything charged forward. The silver line charged in, followed by the stormblades, and with some great tough rolls on my part the two units killed a total of 2 nihilators, although some of their shots also put a bit of damage onto Molik. The storm clad walked forward and shot one of the nihilators that was still alive, killing it and bringing me down to 2 still alive.

Stryker activated and walked to the right, then arced another earthquake through the lancer, this time aiming at Molik Karn, boosting to hit. He missed the shot, but the spell deviated and caught Molik anyways, knocking him down.

What a nice group of berserk-able models!
Skorne Turn 3:
Well, I was almost out of nihilators, but Stryker's feat was gone and it was time for some fun. Makeda let leash drop and Molik forced for one to stand up.

Makeda activated first, and moved forward to make sure she could cover the front of the Cygnar lines with her control area. The then used her feat, cast road to war and cast fate walker on herself.

The nihilators activated next and got ready to bring the pain. With Makeda's feat up they were immune to free strikes, which meant I could put both of them in the perfect position for berserking. They were hitting on 5's (boosted to hit from the feat) and killing on 4's, which means that with a string of average rolls I could eliminate everything that could get within reach of my nihilators. The nihilator on the right went first and started swinging, taking out four models before running out of targets. Then the second nihilator started attacking (with 6 guys within reach of his blade), hit the first model and then rolled a 3 for damage.... *sigh*... Well, that's dice for you.

With that done, the gladiator cast rush on Molik, the beast handlers pulled fury off the gladiator and enraged Molik. One of the beast handlers walked up to the stormguard sitting beside the objective, and with boosted rolls from the feat, easily hit and kill the model (thanks to anatomical precision). Finally Mr. Karn activated, and charged the Lancer. He hit thanks to the feat, and rolled a damage roll of: 6, 6, 5, 5. Doing a whopping 19 points of damage, and making up for my terrible roll earlier. Using side step, Molik shuffled over to the left in order to get closer to the infantry in the back. He took his second attack on the warjack, side stepping again and leaving it on only a few boxes. A finally bought attack put the jack into the ground, and left Molik with 3 fury left to spend. He used fate walker on himself and purchased an attack on the stormguard in the back, easily hitting and killing it.

With that done, Molik and Makeda both used fate walker to retreat back behind my lines and (hopefully) out of danger.


Cygnar Turn 4:
In hindsight, I should have moved Molik to the left side of my table (near the gladiator), because where I left him was right within assault range of the storm blades. Stryker kept his focus, and activated first. He moved over to the right side of the table and cast an arcane bolt at my un-engaged nihilator, hitting and killing it. The remaining stormguard activated next and took a swing at the nihilator in front of him, also hitting and killing, and freeing up the stormblades.

The stormblades activated next, recieving an assault order, and charged forward. Two of them assaulted the beast handlers near my objective, and the rest assaulted Molik Karn. Both of my beast handlers died, and my objective received a couple points of damage. The models charging Molik got some pretty good rolls, and managed to kill him with a couple of attacks to spare, 

After writing this I am realizing that I don't remember what the stormclad did this turn, but I think that one of my nihilators made its tough roll and the stormclad had to finish the job. Either way the result is the same, but I should probably start taking notes during games to help remember everything!


Skorne Turn 4:
With all of my nihlators and Molik gone, things are starting to look pretty bleak. If I still had Molik around for fate walker I would probably get Makeda into the action at this point, but I didn't want to leave her in the charge range of Stryker or the stormclad, so I activated her fist and moved her back behind the wall on my left.

Next I had an idea, that worked a lot better in my head than it did on the table. For some reason I thought that slamming one of the storm blades would cause him to damage all of the other storm blades in his path. I forgot that he would stop moving as soon as he contacted another base of his size, so I activated the gladiator, he cast rush on himself and he used a slam on the left storm blade. It died instantly, but it only hit the model right next to him, doing light collateral damage (as it was the officer that was hit) but not killing him. So my gladiator ended up killing a grand total of one model. Not exactly what I had planned.

Next the beast handlers moved forward and cleared out the storm blades by the objective, while one went over near the gladiator and hit the officer but only did one point of damage, leaving him with a single box left.


Cygnar Turn 5:
Stryker gave 3 focus to the storm clad, and it activated first. It charged the objective, killing it, and clearing out my beast handlers with lightening leaps. The stormblades moved in to attack the gladiator, doing a fair amount of damage to the beast and killing the beast handler. Stryker ran over to the other side of the zone in order to dominate it and ended the turn.


Skorne Turn 5:
At this point I either need to kill Stryker or lose, because the storm clad will kill my gladiator and Stryker can just dominate for the win. Makeda leaches the fury off of the gladiator and activates first, moving forward and spending all of her fury to cast rush and heal the gladiator. The gladiator activates and tramples towards Stryker, hoping that after free strikes it still has its systems up to try and kill Stryker (although even with all of its systems up, I don't know that he could do it). Unfortunately the dice gods were not in my favor, and the free strikes taken by the gladiator are enough to kill it, ending the game with Stryker dominating for a Cygnar victory!


Thoughts on the game:
While I ended up losing the game, it was pretty close until I lost Molik, which was a pretty big hit to the army. If I had moved him to the left and out of the charge range of the stormblades I would have still had a pretty good shot, but it's hard to say what would have happened. I really enjoyed eMakeda, and she seems like a very strong caster for getting the alpha strike, with some insane assassination potential. Dave kept Stryker back all game, knowing the threat that Molik brings to a caster, as he has a 22" threat range under Makeda (18" without using side step). It is a crazy threat range, especially with no free strikes and boosted attack rolls from the feat, and it can very quickly end a game if your opponent makes a single positioning error.

I am looking forward to trying out Makeda again, as well as Mordikaar who I have just finished assembling. Really enjoying Skorne, and I hope you guys are enjoying the reports!